You've had coffee so awful it makes you want to gag. You've had coffee so amazing it seems like angels are serenading your taste buds. What are the secrets to making angelic coffee—and avoiding the bitter, sour garbage?
Snobs will tell you “it's so hard, like, you shouldn't even try. Look at me, I'm an elitist barista!”.
But we disagree. You can have better coffee tomorrow.
And great coffee isn't just tasty. It's the perfect way to start off your day (and a bad cup can really kill a good morning vibe). So we're spilling all the beans in this master guide on how to make coffee taste good.
You're about to discover…
- Why most people drink bleh coffee and don't even know it
- The 5 rules you must follow to elevate your coffee (without becoming a snob)
- The ways many coffee lovers ruin their beans (and how to avoid them)
Ready to transform your morning mug of coffee into a liquid masterpiece?
Here's everything you need to know.
Rule #1: Don't Buy Sad Coffee Beans
Repeat after me…
Good coffee always begins with good coffee beans.
They're not made in a factory. They don't all taste the same. They're agricultural products, and so flavor diversity is 100% natural.
And that means some beans are great—and some are not (sad). Leave the low-grade beans to instant coffee. YOU want om-nom quality.
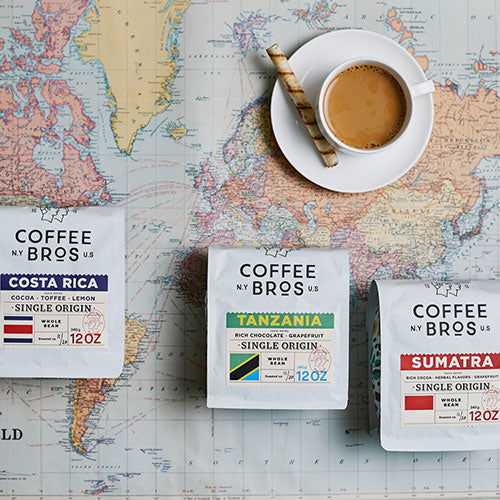
It's officially called: “specialty-grade coffee”, or “specialty coffee” for short.
Always Specialty Coffee
It's the highest level of coffee you can buy, graded by certified “Quality Graders” who have taste buds that are unbelievably precise. You know… the “oh yes, I'm getting a note of raw chocolate from southern Madagascar” type.
These coffees have natural sugars, clean acidity, and tons of wild flavors. Think notes like strawberries, cinnamon, pine, and mango. It can get pretty exotic.
If you only take one thing away from this article, make it this: always specialty coffee.
But! There's still more you need to avoid to truly avoid sad coffee beans:
- Buy freshly roasted beans. Coffee only has 2-3 weeks of peak freshness before the flavor begins to decline pretty quickly. Beans that sit on the shelf of grocery stores, are usually 2-3 months old… so skip the coffee aisle and buy directly from a roaster who roasts to order.
Read More: Do Coffee Beans Go Bad?
- Get em whole bean. Ground coffee quickly spirals downward in quality. The tiny grounds just can't contain their freshness as long as whole beans—and you can taste it after just 20-30 minutes of being exposed to oxygen (a real bummer). This means you need a burr grinder at home. Trust me, it's so worth it and no less convenient.
Boom! You have amazing coffee beans (well done, you're 75% the way there).
Coffee Storage Tips To Maximize Freshness
Once you have your specialty-grade, freshly roasted, whole bean coffee, you need to store it properly. Just remember this very basic rule: no heat, no air, no light.
Heat causes food to break down faster. Fresh air causes things to ‘oxidize' (food spoils, copper turns green, stuff like that). And light—even from a lightbulb—can speed up natural decay. Avoid these things to ensure your beans don't go stale earlier than 2-3 weeks.
Read This: How To Store Coffee Beans To Maximize Flavor
Now let's make sure you're brewing correctly.
Rule #2: Pick Your Coffee Brewer Wisely (Most People Don't)
Cheap coffee pots may get the job done, but they have some massive faults. Like, the fact that most don't even get up to the ideal brewing temperature of 195 degrees.
Unless you spent $100+, your coffee pot probably maxes out around 190 degrees… and that generally leads to sour and underdeveloped flavors.
This is why we're big on manual coffee makers.
- You're in complete control. With a normal coffee pot, you have zero control over the water temperature or brewing recipe. With a manual coffee maker, you can just heat the water longer or slightly adjust your technique to get the flavor you want.
- Making coffee by hand feels ah-maz-zing. The satisfaction of saying “I made this with my bare hands (kinda)” is just what a drowsy morning calls for. Start off with a win.
- The coffee tastes better. Period. From the outside, some manual coffee makers seem to work just like coffee pots. The process is roughly the same idea, sure, but the results are so much better from the manual brewer—because you don't have cheap gear messing up your brew every time.
Manual Coffee Makers Are Taking Over
There are several types of manual coffee makers, but they boil down into a few main categories:
Immersion brewers like the french press make robust, full-flavored coffee. The coffee grounds and water sit together for 2-4 minutes, which infuses a rich flavor you'll never get from an auto coffee pot.
Pour over brewers like the Chemex make a cleaner, crisper, more nuanced coffee. The paper filter, paired with the careful water pouring technique (and not the chaotic flood you get with coffee pots) lead to stellar coffee.
There are some unique brewers too, like the AeroPress (a mild pressurized brewer), the moka pot (a stovetop espresso maker), and the siphon (creates a vacuum to brew the coffee).
Suggestion: it's hard to beat the french press for beginners. The brewing process is really straightforward and the coffee is stunningly delicious. Learn more about home coffee makers right here.
Rule #3: Use Better Water (No, Really)
Lots of people think this next idea is overkill—and lots of people are wrong.
Coffee is 98% water, so don't you think your water should taste good too?
A small amount of minerals in your water helps bring out the flavor, but too much, and you'll end up with a dull, lifeless brew. If your local water supply is “hard” (has lots of calcium or magnesium hardness), you'll want to filter your water.
This is the problem most people have who buy beans from a coffee shop, then realize they don't taste the same at home. Cafes use special filtered water, but most people just use tap water.
Read more about how water impacts your coffee right here.
Here are a few ways you can fix your water supply:
- Britta pitcher / carbon filter, it helps some
- Home reverse osmosis system, wow that's expensive
- Third Wave Water mineral packets, oooh just right
Mix a packet of Third Wave Water minerals in a jug of distilled water and you'll instantly have the exact water that the Specialty Coffee Association recommends. It's by far the easiest way to optimize your water so it doesn't kill your coffee's flavor.
And Don't Forget About Water Temperature
Remember how most coffee pots don't even get up to the right temperature?
As a rule, your brewing water should be between 195 and 205 degrees.
In this range, the water extracts the yum flavors from the coffee fast enough for most brewers (2-3 minutes) without over extracting the bitter flavors.
- Under 195 degrees 👉 too slow extraction 👉 sour coffee
- Over 205 degrees 👉 too fast extraction 👉 bitter coffee
Check your local elevation, because the higher you are in altitude, the lower the temperature your water needs to boil.
- Sea level: 212 degrees
- 1,000ft: 210 degrees
- 3,000ft: 206 degrees
- 5,000ft: 202 degrees
- 7,000ft: 198 degrees
So if you live at sea level, you need to give your water a couple minutes to cool after it boils. At 3,000 feet, you're safe to use your water right off the boil. And if you're all the way up in 7,000 feet, you better start brewing immediately as it boils to ensure you stay in the right temperature range.
Rule #4: Stick To The Golden Coffee To Water Ratio
How much coffee should you use?
This next part is where a lot of people fall off. Sure, it may look like a bunch of math, but it's actually really, really easy. We'll show you how to figure it out once so you never have to do it again.
99% of coffee lovers agree that these are the best coffee to water ratios…
1 gram of coffee to 15-18 grams of water (1:15-18).
That's it! No need to get complicated here. 1 gram to 15-18 grams. Simple.
Here's our ultimate guide to coffee and water ratios.
Why These Ratios Rock
Using the right balance of coffee and water accomplishes two things:
- Strength — making sure the flavor is balanced, not weak or too strong
- Flavor — creating a balanced extraction, not too much (bitter) or too little (sour)
Imagine making a cup of coffee with one bean. It wouldn't work. It'd be so weak you could hardly taste it, but even if you could taste it, it'd be really bitter—because that one bean had access to way too much fresh water, which led to over extraction (all the bitter stuff came out).
Now imagine making a cup of coffee with five hundred beans. There would hardly be any liquid coffee because the beans would soak it all up. And if any liquid did escape into your mug, it'd be crazy over-concentrated (strong). However, it'd also taste really sour, because there wasn't enough water to extract a balanced flavor from the grounds—only enough to get the acids.
If you want a stronger cup, try a 1:15 ratio. It's more coffee per water, so it'll be more concentrated, but also slightly less extracted (since there's less water to go around extracting flavor from each ground).
If you want a more mellow coffee, go with a 1:18 ratio. It's more water per coffee, so it'll taste a bit lighter, but also a bit more extracted (since there's more fresh water to pull out flavors from the grounds).
How To Find The Perfect Ratio In 10 Seconds
Okay… so back to that math. Let's knock it out real quick.
A single cup of coffee is ~250ml of liquid. Thankfully, 250ml of water is exactly 250 grams also (easy). All you have to do is figure out how much coffee you need. So pick your ratio, then do this…
- 250 (water) / 18 (ratio) = 13.8 (grams of coffee)
You can use your phone. It takes 10 seconds or less.
But what if you're starting with coffee you already have, and not a water goal? Figure out how much coffee you have (we'll say 42 grams), pick your ratio, then do this…
- 42 (coffee) * 18 (ratio) = 756 (grams/milliliters of water)
Pro Tip: write down your favorite recipes on a notepad and keep it by your coffee setup so you don't have to pull out your phone calculator every morning.
Rule #5: Make Small Recipe Changes For Better Brews
You now know 95% of what it takes to make cafe-quality coffee.
The last thing to learn is how to taste your coffee, troubleshoot off flavors, and make small adjustments to your recipe to make it taste even better.
It all starts with understanding extraction.
How To Taste The 5 Stages Of Extraction
When you make coffee, the water literally pulls stuff (acids, sugars, oils, solids) out of the beans… AKA, extraction. Here's how it happens…
- Stage 1 is acids. Bright, tangy, sour—you know what we're talking about. These are some of the first things to be extracted from the grounds.
- Stage 2 is mellow flavors. Organic compounds, natural oils, and other things start to dissolve. This calms down the acids and creates a more diverse flavor profile.
- Stage 3 is sugars. Natural sugars come next, coating all the other flavors in a mild sweetness. This is where good brewing stops!
- Stage 4 is too far. After the sugars, there are only bitter acids and tannins left. These cancel out the sugars and make the coffee taste dull, so stop brewing before this point.
When you taste your coffee, try to imagine where you think it falls in these stages.
Is it sour and taste thin? You probably got mid-way through Stage 2, but not far enough for the acids to get balanced out with a full flavor.
Is it bitter and dull? You almost certainly went into Stage 4, cutting off the good flavors from the first three stages.
How To Fix Coffee That's Only Meh
Let's say the obvious: if your coffee tastes under extracted, you want to extract more. If it tastes over extracted, you want to extract less.
Here are the two main strategies for fixing your coffee:
- Change the brewing time. For brewers like the french press, where the coffee brews until you directly stop it, you can easily just change the brew time. Adding or cutting even just 15 seconds can make a difference. For pour over brewing, this means pouring your water more slowly to extend the total brew time or faster to cut it down.
- Adjust your grind size. Finer grounds extract faster, and coarse grinds take longer. If your coffee is under extracted, grind finer next time. If it tastes over extracted, try a coarser grind size to slow down the extraction (and lead to less overall). And for pour over brewing, remember that adjusting your grind size will also adjust the rate your water drains (impacting your total brew time), so make small changes here. (Related Reading: "10 Best Coffee Grinders (Review)" from our friends at Urban Bean Coffee)
Also Read: Everything You Need To Know About Grind Size
Just make sure you only change one thing at a time. If you try to change both, you can easily over-correct and still end up with bad coffee.
Action Step: Start With Rule #1
Seems like a lot?
Yeah… it kinda is.
So here's where you should start: Rule #1.
Always specialty coffee.
You can build on top of that, but specialty-grade coffee gets you 75% of the way to amazing coffee at home—so that's the obvious starting point.
And it just so happens we can help you get some that tastes…
- Sweet and bright, like a strawberry 🍓
- Full but soft, like a peach 🍑
Or maybe you prefer…
- Deep and creamy, like dark chocolate 🍫
- Warm and complex, like chestnut 🌰
👉👉 Either way, get your next bag of specialty coffee beans right here.