Espresso Puck Prep: Brewing The Perfect Espresso
Introduction
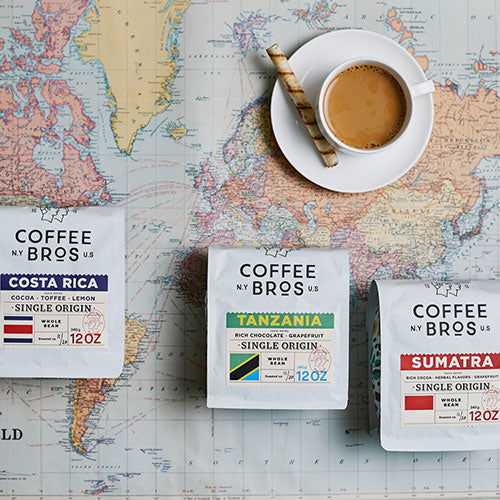
Crafting the perfect shot of espresso heavily relies on the preparation of the espresso puck, which is a crucial step. The outcome of this step greatly influences the extraction and the taste of the espresso shot. Although some steps within the espresso puck preparation can be skipped, it's best to stick with all of them consistently to achieve the desired results. Some of these steps may affect the flow rate and the time of the shot, such as using a paper filter at the bottom of the basket, which often increases the flow rate. Changing these steps can completely alter the outcome of the espresso shot, leading to the impression of needing to adjust the grind size. Therefore, it's important to choose the espresso puck preparation steps that suit your preference and stick with them throughout your journey of perfecting your espresso shot for your preferred coffee. The only change that should be made when returning to the preparation phase is adjusting the grind size. Below is a breakdown of each step in the order of operation flow.
Table of Contents
- Step 1: Choosing the correct espresso basket
- Step 2: Use the correct grinder and settings
- Step 3: Choosing a brew recipe (coffee-to-water ratio)
- Step 4: Ross Droplet Technique to prevent static electricity
- Step 5: Adding an espresso paper filter
- Step 6: Weiss distribution technique
- Step 7: Tamping
- Step 8: Adding a metal mesh filter
Choosing the correct espresso basket
A common area where people struggle with brewing espresso is understanding which basket size to use. Even when the correct size is chosen, incorrect dosing can cause issues during the extraction phase.
Baskets come in single, double, or triple sizes, with most people brewing double shots ranging from 14 to 22 grams. However, shot proportions have changed over time with larger drink sizes, so it's not uncommon to see baristas pulling an 18-20 gram double shot.
Each basket is graded based on its capacity (example, 20 gram basket) and circumference (example, 58mm), which corresponds to the espresso machine's group head size. For instance, a 58mm group head machine requires a 58mm portafilter and basket. It's essential to fill the basket with the correct amount of coffee, as adding too little will change the headspace and negatively impact your brew. Conversely, overfilling the basket will create a thicker puck, making it more difficult for water to penetrate during brewing. Stick to the graded range (+ or - 2 grams) of your basket and you will achieve a well-balanced espresso shot.
| Basket Size | Basket Range |
|
Single Basket |
6 - 10 grams |
|
Double Basket |
12 - 20 grams |
|
Triple Basket |
18 - 20+ grams |
Single Basket
Double Basket
Triple Basket
Espresso grinders and settings
To ensure a fine grind, it's important to choose an espresso grinder specifically designed for the job, with either a conical or flat burr system. Prices for good espresso grinders range from under $300.00 to over $500.00 for more advanced models with better consistency and efficiency. While commercial-grade grinders can cost thousands of dollars, their higher price is largely due to their larger, more durable motors. When shopping for an espresso grinder, key features to consider include the type and size of burrs, stepless grind adjustments, weight or time-based grinding, low retention rates, anti-clumping designs, and motor size. Below are some top-quality espresso grinders that offer these features.
For more on the topic read: Finding The Best Espresso Coffee Grinder
Espresso Recipe Choices
Selecting a portafilter basket that corresponds with your recipe when brewing espresso is essential. Going back to Step 1 of choosing the correct basket for the job, if you chose a double basket, you should be brewing recipes that call for 16 – 20 grams of ground coffee in “x” grams of espresso liquid.
Recall that using a basket that is either too small or too large for your recipe choice will give you trouble during the extraction phase and ultimately lead to an inconsistent brew.
As you refine your espresso puck preparation, note that any changes to the amount of grinds used in your portafilter will impact flow rates and shot times, so try to keep things consistent until you brew the perfect shot of espresso.
Recipes to choose from include:
Ristretto: A ristretto shot, also known as a restricted or short shot, is characterized by a brew ratio between 1:1 and 1:1.5.
You can pull single or double ristretto shots, and they are simply shots that are stopped early in the brewing process to reach the goal of 1 gram of coffee to 1 gram of liquid.
A 1:1 ristretto shot may look like, 14 grams of coffee in a single basket, yielding 14 grams of espresso liquid in your cup. Ristretto shots are darker, bold, and richer than the other types of espresso shots due to the tight coffee-to-water ratios.
Normale: A normale shot, also known as a standard shot, typically features a brew ratio between 1:2 and 1:3. Using a higher ratio can result in a clearer espresso and a higher extraction percentage.
A typical normale shot may look like, 18 grams of coffee in a double basket, yielding 36 grams of espresso liquid within 30 seconds.
Lungo: A lungo is a larger espresso shot pulled at a higher brew ratio, resulting in a cup twice the size of a regular espresso shot. The ratio of coffee to water in a lungo is typically between 1:3 and or 1:4, which may vary depending on the barista or home brewer's taste preference.
A lungo shot is typically used when the barista wants to increase the drink’s clarity. Lungo shots work very well for light-roasted coffees and complex single origins.
A typical lungo shot at a 1:4 ratio may look like, 18 grams of coffee into your portafilter, yielding 72 grams of espresso liquid in your cup.
Preventing Static Electricity (RDT)
In 2005, David Ross introduced a groundbreaking method called the Ross Droplet Technique (RDT), which helps reduce static electricity and buildup in your grinder and reduce coffee grind retention (what you put in, you should get out).
Using espresso paper filters
There are also additional benefits of using a paper filter at the bottom of a portafilter, as it will decrease sediment in your cup and increase flow rates allowing you to grind finer, which may help result in higher extraction rates.
Note on how to use espresso paper filters properly:
The paper filters on the market are creped paper; one side is rough, while the other is smoother. The rough side of the paper must touch the bottom of the basket, while the smooth side touches the ground coffee. This is a crucial point to remember, as facing it incorrectly may limit the flow rate and reduce sediment absorption; placing it correctly each time will improve consistency from one cup to the next.
As mentioned earlier, this step is unnecessary to produce an excellent espresso beverage, but it can drastically help. If you include this step, expect to grind finer, and remind yourself upon your next brew that you must adjust the grind size quite a bit if you exclude the paper filter.
Remember, we are all about repeatability, so if you include this step, include it moving forward until you produce the perfect cup of espresso.
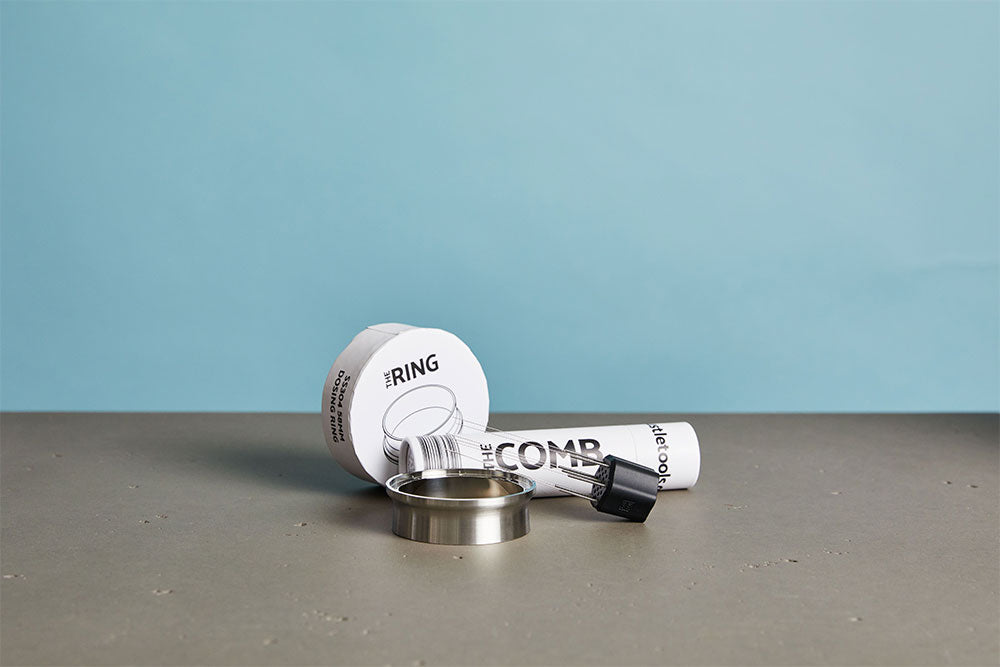
Distributing grounds with WDT
The Weiss Distribution Technique, also known as WDT, is a popular and enduring method of distributing espresso that facilitates even distribution and clump removal in coffee grounds, resulting in better espresso extraction.
Regardless of whether you use a high-end commercial coffee grinder, clumps will inevitably form and require breaking up. The Barista Hustle comb is an excellent tool for achieving even distribution of coffee grinds in your portafilter basket, which will enhance the tamping process.
We strongly advise incorporating this step into your espresso brewing routine, as it is an inexpensive and fast way to improve the quality of your espresso.
Tamping technique
If you nailed the previous steps and have an evenly distributed puck of coffee, then tamping should be a breeze! Always apply even 30 lbs of pressure when you tamp the espresso grounds.
The optimal tamping pressure is roughly 30 pounds, where you hit “maximum density,” where the coffee grounds cannot be compacted further.
The reason why 30 pounds of pressure is suggested is due to the “maximum density” concept. Once you reach maximum density, your job is complete. Further, tamping at 35 or 40 pounds of pressure adds stress to your joints and doesn’t further impact your brew.
Issues arise when you tamp too soft, creating inconsistencies in the puck, often causing channeling. You want to take tamping pressure from the equation on why your espresso brews like “x” or tastes like “y”. Always tamp to 30 pounds of pressure or use a spring-loaded tamper that always hits the same force each time