Brew better espresso with the espresso flywheel
Introduction
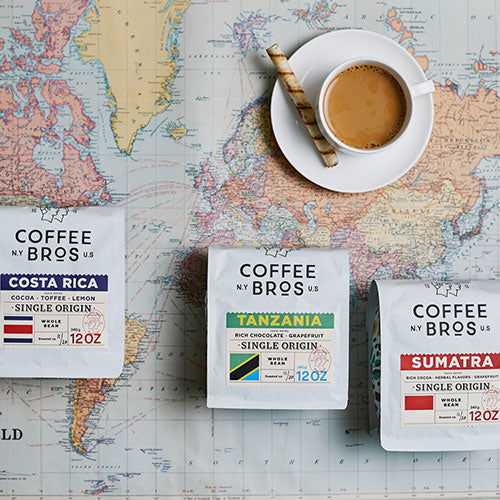
Espresso brewing is by far the most complex brewing method in coffee, and brewing the perfect espresso can be difficult. We wanted to introduce the concept of the Espresso Flywheel, which breaks down the influential factors of brewing the perfect espresso. The Espresso Flywheel has three main components; Prep, Extract, and Evaluate. At each stage of the Flywheel are factors that you, as the barista, can influence to alter your shot of espresso for better or worse. The goal of the Flywheel is to understand all the influential factors you have control over to produce the best espresso possible. This concept works well for dialing in an espresso or, in general, the steps you should take to brew the best espresso possible.
Coffee Subscription Deal
Subscribe to Coffee Bros. coffee for 25% off when using code "FTSUB25" at checkout
Table of Contents
-
Espresso Puck Preparation (Phase 1)
-
Espresso Extraction (Phase 2)
-
Evaluate Espresso (Phase 3)
- Total dissolved solids (TDS readings)
- Visual examination of your espresso
- Tasting your espresso
-
Understanding the Flywheel
The Flywheel design was borrowed from my Amazon consulting days, where this brilliant concept from Jeff Bezos was drawn up on a napkin on how to grow the Amazon business. Thus, the Amazon Flywheel drives customer satisfaction by increasing sellers, which increases selection, which drives up customer satisfaction, which increases traffic on Amazon; the increase of sellers and selection allows Amazon to be more competitive, thus lowering cost structure and prices, ultimately leading back to an even more satisfied customer.
The Espresso Flywheel has little to do with the above Amazon Flywheel, but it was an interesting tidbit of information concerning the design. If you are a barista at a café, maybe the Customer Satisfaction piece is helpful to inject into this concept, as brewing better espresso at home or a café is the end goal.
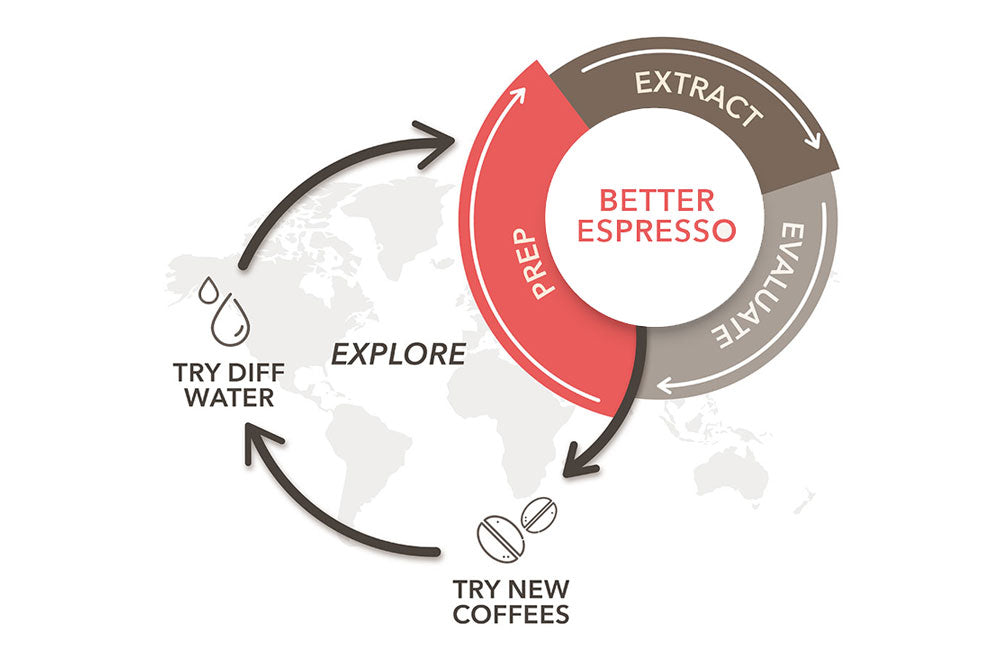
The Better Espresso Flywheel's goal is to brew better espresso every time by following the Prep, Extract, and Evaluate steps. Each phase influences the following phase, so poorly executed preparation will likely lead to an underwhelming extraction and a lackluster evaluation (or taste). Understanding how each step affects the next step will help one evaluate issues along the flywheel and take the necessary actions to improve moving forward.
Here's a quick rundown of each step in the Flywheel:
Espresso Puck Preparation (Phase 1)
Espresso puck preparation encompasses everything one does before locking in the portafilter and brewing your espresso. This includes, and we’ll detail more below, basket choices, recipe choice, grinding, WDT, adding filter paper, tamping, and adding mesh filter.
Once these steps are completed, you move on to the next influential factor of extraction.
Espresso Extraction (Phase 2)
As you prepare to brew and during the brewing process, the extraction step will contain all the influential factors you can take to help you brew better espresso. This includes choice of water, volumetric options, temperature settings, pressure settings (if your machine allows it), flow rate settings (if your machine allows it), and total time.
Once these steps are completed, it is time to evaluate your espresso.
Evaluate Espresso (Phase 3)
Your evaluation step occurs during your extraction process and then again once you view and taste your espresso. The extraction process shows us lots of crucial information like flow rates, early blonding, channeling, and so on, while the taste portion of the extraction will confirm much of what we saw visually.
The Espresso Flywheel evaluation portion can contain steps like TDS readings. Still, it will primarily focus on visually examining the espresso, crema, tiger striping, etc., and most importantly, how it tastes!
Espresso Puck Preparation (Phase 1)
Espresso Puck Preparation (Phase 1)
-
- Choosing the correct basket for your espresso
- Espresso grinder type and settings
- Espresso recipe choices (coffee-to-water ratios)
- Ross Droplet Technique (RDT)
- Espresso paper filters
- WDT (distribution tools)
- Tamping
- Espresso mesh filter
Espresso puck preparation is the most important step for crafting the perfect shot of espresso. Everything you do or don’t do in this step greatly influences your extraction and, ultimately, your evaluation/taste step.
You’ll learn that all steps within Espresso Puck Preparation do not technically need to be done to brew a tasty espresso, but if you choose to do them all, stick with them all every time. Some steps within espresso puck preparation may influence the flow rate and the time of your shots. For example, adding a paper filter at the bottom of your basket often increases the flow rate. Adding in or removing this step upon your next brew will completely alter your espresso shot, making you think you may need to grind finer or coarser. The most important suggestion here is to choose the espresso puck preparation steps that make sense for you (some are necessary) and stick with them throughout your journey to perfect an espresso shot for your coffee of choice. The only alteration that should be made when returning to the preparation phase should be adjusting your grind size; all else should remain constant.
We will now detail each step within Espresso Puck Preparation in order of operation flow from the first thing you need to do to the last.
Choosing the correct espresso portafilter basket
One area where most need help is understanding what type of basket they should use for brewing espresso. Even when the correct basket size is chosen, underdosing or overdosing in your basket can create problems downstream in the extraction phase.
Baskets are single, double, or rarely; you’ll find a triple basket. Most brew double shots of coffee which range from 14 grams upward to 20 – 22 grams. Technically speaking, a traditional single shot of espresso falls around 7 grams, so a double shot should be roughly 14 grams, and a triple shot 21 grams. That said, shot proportions have changed over time as drink sizes have also shifted. It is common to find baristas pulling an 18 – 20-gram double shot.
Every basket is also graded by how much coffee it can hold and its circumference (for example, 58mm). The circumference metric correlates to your machine’s group head. If you have a 58mm group head on your espresso machine, you can only shop for 58mm portafilter baskets. When you shop for baskets, you may see them listed as (20g), meaning they can adequately hold + or – 2 grams of coffee from that figure.
Adding too little coffee in any basket alters the headspace (the space between the compressed coffee puck and the group head screen), significantly impacting your brew. The ideal headspace in any coffee basket is around 2mm (you can read an in-depth article on this topic at Barista Hustle). A coffee basket that is filled too high and has little headspace will mean that your puck is much thicker, making the water work harder to penetrate your espresso puck. To do so, you must brew much higher pressure (not recommended) or grind much coarser. Stick in the range your coffee basket is graded, and you’ll be in a good place!
Espresso grinder type and settings
When looking for a grinder for espresso, it must be able to grind fine enough to do the job. Look for grinders specifically marketed as espresso grinders and ones that have a conical or flat burr system. You will find good espresso grinders in the sub $300.00 range and more advanced, consistent, and efficient espresso grinders in the $500.00+ range. Espresso grinders for café use can be as high as several thousand dollars, but the main difference is the motor’s size and quality and build quality, which helps it last constant daily use.
Features to look out for when purchasing an espresso grinder are:
- Type and size of burrs (conical or flat)
- Grind setting adjustments (stepless settings are ideal as it is essentially limitless)
- Weight grinding or time-based grinding.
- Low retention rates
- Anti-clumping designs
- Motor size
Recommended Reading: The best espresso grinders across all skill-levels and price points
Espresso recipe choices
Your choice of portafilter basket and your recipe should go hand in hand. Choosing a double basket will limit your recipe choices to roughly 16 – 20 grams of coffee to “x” grams of water. Here is where you can get creative and follow the traditional espresso recipes or something in between. That said, keep things consistent as you go through the Espresso Flywheel.
If you brew a 16-gram “normale” shot, continue as you cycle through the Espresso Flywheel to adjust and improve your espresso. Changing this one factor will alter everything downstream in the brewing process, so consistency is the key here.
Espresso recipes to choose from:
Ristretto: A ristretto shot, also known as a restricted or short shot, is characterized by a brew ratio between 1:1 and 1:1.5.
You can pull single or double ristretto shots, and they are simply shots that are stopped early in the brewing process to reach the goal of 1 gram of coffee to 1 gram of liquid.
A 1:1 ristretto shot may look like, 14 grams of coffee in a single basket, yielding 14 grams of espresso liquid in your cup. Ristretto shots are darker, bold, and richer than the other types of espresso shots due to the tight coffee-to-water ratios.
Normale: A normale shot, also known as a standard shot, typically features a brew ratio between 1:2 and 1:3. Using a higher ratio can result in a clearer espresso and a higher extraction percentage.
A typical normale shot may look like, 18 grams of coffee in a double basket, yielding 36 grams of espresso liquid within 30 seconds.
Lungo: A lungo is a larger espresso shot pulled at a higher brew ratio, resulting in a cup twice the size of a regular espresso shot. The ratio of coffee to water in a lungo is typically between 1:3 and or 1:4, which may vary depending on the barista or home brewer's taste preference.
A lungo shot is typically used when the barista wants to increase the drink’s clarity. Lungo shots work very well for light-roasted coffees and complex single origins.
A typical lungo shot at a 1:4 ratio may look like, 18 grams of coffee into your portafilter, yielding 72 grams of espresso liquid in your cup.
Ross Droplet Technique (RDT)
As we approach grinding our coffee, there are a few things to watch.
First, if you are using a larger espresso grinder with a hopper and you already have the hopper filled, you cannot use this technique.
We always advise single-dosing espresso versus filling up your hopper with all your coffee. There are a few benefits to single-dosing, and one revolves around the idea of the anti-static and reducing grind retention using the Ross Droplet Technique.
In 2005, David Ross introduced a groundbreaking method called the Ross Droplet Technique (RDT), which helps reduce static electricity and buildup in your grinder and reduce coffee grind retention (what you put in, you should get out).
To use this method, prepare a spray bottle with appropriate water for brewing espresso. Before grinding your coffee beans, give them a light spritz of water with the spray bottle and shake them gently to ensure the water is evenly distributed.
As mentioned, this technique only works for coffee grinders meant for single-dosing, like the Niche Duo, DF83, and other grinders in this class.
If your grinder has low retention and doesn't product much static when grinding (you would know if grounds get all over the place), then feel free to skip this step!
Even science says that spraying water on your coffee will improve extraction!
Espresso Paper Filters
We first discovered using espresso paper filters at the bottom of the portafilter basket (added before grinding your coffee) from Scott Rao. Scott Rao, back in 2019, posted about this technique in a viral Instagram post explaining how using espresso paper filters (on the bottom and top) can decrease channeling and increase overall extraction.
There are also additional benefits of using a paper filter at the bottom of a portafilter, as it will decrease sediment in your cup and increase flow rates allowing you to grind finer, which may help result in higher extraction rates.
Note on how to use espresso paper filters properly:
The paper filters on the market are creped paper; one side is rough, while the other is smoother. The rough side of the paper must touch the bottom of the basket, while the smooth side touches the ground coffee. This is a crucial point to remember, as facing it incorrectly may limit the flow rate and reduce sediment absorption; placing it correctly each time will improve consistency from one cup to the next.
As mentioned earlier, this step is unnecessary to produce an excellent espresso beverage, but it can drastically help. If you include this step, expect to grind finer, and remind yourself upon your next brew that you must adjust the grind size quite a bit if you exclude the paper filter. Remember, we are all about repeatability, so if you include this step, include it moving forward until you produce the perfect cup of espresso.
Weiss Distribution Technique (WDT)
A WDT, or the Weiss Distribution Technique, is one of the longest-standing espresso distribution methods that helps improve espresso extraction through the even distribution and removal of clumps in your coffee grounds.
Almost every coffee grinder, even the high-end commercial ones, will produce clumps that need to be broken up. A WDT like the one from Barista Hustle will also help you evenly spread your grinds in your portafilter basket, improving the tamping step.
We highly recommend this step and find it one of the quickest and cheapest ways to improve your espresso brew.
Tamping your espresso
If you nailed the previous steps and have an evenly distributed puck of coffee, then tamping should be a breeze! Always apply even 30 lbs of pressure when you tamp the espresso grounds.
The optimal tamping pressure is roughly 30 pounds, where you hit “maximum density,” where the coffee grounds cannot be compacted further.
The reason why 30 pounds of pressure is suggested is due to the “maximum density” concept. Once you reach maximum density, your job is complete. Further, tamping at 35 or 40 pounds of pressure adds stress to your joints and doesn’t further impact your brew.
Issues arise when you tamp too soft, creating inconsistencies in the puck, often causing channeling. You want to take tamping pressure from the equation on why your espresso brews like “x” or tastes like “y”. Always tamp to 30 pounds of pressure or use a spring-loaded tamper that always hits the same force each time.
Espresso mesh metal filter
You may have seen videos of baristas placing a metal mesh filter on their compressed coffee puck, but why are they doing this? It’s quite helpful! The metal mesh filter is uniform in composition, unlike most espresso pucks, meaning the water will have a tough time finding pockets of inconsistencies to penetrate, thus helping you to avoid channeling. Simply put, the metal mesh filter evenly distributes the pressurized water coming out of your group head to help reduce channeling and improve even puck saturation.
Espresso Extraction (Phase 2)
Espresso Extraction (Phase 2)
-
- What water to use for espresso
- Espresso volumetric settings
- Espresso temperature settings
- Espresso pressure settings and pressure profiling
- Locking in your portafilter
- Monitoring espresso flow rate and total time
- Early blonding, tiger striping, and other indicators for channeling
-
You went through the exhaustive list to perfectly prepare your espresso puck; now it is time for the extraction phase. There are a few things to remember before you hit the button to brew (or pull down your lever if you use a fancy manual espresso machine). The following sections will lightly touch on areas you should be conscious of before and during your espresso extraction. While it is difficult to give firm recommendations as every coffee is different, your basic understanding of these factors will help you iterate on future extractions to craft the perfect espresso.
What water to use for espresso brewing
88 – 90% of what is in your espresso cup is water! High-quality spring water is a great place to start. Crafting your water using distilled or reverse osmosis water and then adding mineral packets or liquid like 3rd Wave Water or Lotus Water can be fun to experiment with.
When brewing great coffee, you must use balanced water regarding total hardness and alkalinity. The total solids within the water and what those solids are, the amount of calcium, sodium, magnesium, potassium, etc., will also significantly influence the outcome of your brew.
Below is a chart and referenced article written by Astrophysics Jonathan Gagné, whose contribution to coffee has been spectacular.
We encourage you to understand water better and how it impacts your brew. Changing this one factor can significantly impact the taste of your espresso, or any coffee brew.
- Colonna-Dashwood & Hendon (red line): Recommendations from the book “Water for Coffee: Science Story Manual”
- Specialty Coffee Association (green line)
- Specialty Coffee Association of Europe (blue line)
Espresso volumetric settings
This next step all depends on the choices made during your espresso puck preparation like basket size, amount of grinds in your portafilter, and if your espresso machine has preprogrammed, programmable, or manual settings.
Your basket choice (single, double, triple) and recipe choice (coffee-to-water ratio) will determine if you hit the single espresso button, double espresso button, or a custom volumetric setting either programmed by you or the one that comes with the machine.
Most espresso machines will have simple volumetric settings where the shot stops after a certain amount of water leaves the group head or the machine hits a certain time, let’s say 35 seconds. Some machines have a manual override button to hold down to extend your shot or program it to a specific water volume. Other machines may have water on and off valves, so paying close attention to time and weight here will be critical!
As with all other factors leading up to this point, keep your volumetric settings consistent until you brew the perfect shot of espresso (no channeling, hits your recipe time and volume, etc.), and then adjust this stage if needed.
Espresso temperature settings
With any brewing method, setting your temperature can significantly alter the taste of the final brewed beverage. The most basic suggestions involve matching your coffee roast level (light, medium, and dark) to a range of suggested brewing temperatures. We suggest starting in the below ranges and again only making a few adjustments here unless your coffee is overly sour or extremely bitter. However, sticking with the ranges below should avoid that.
| Roast Type | Optimal Brewing Temp (Fahrenheit) | Optimal Brewing Temp (Celsius) |
| Light | 199 - 205 | 93 - 96 |
| Medium | 194 - 200 | 90 - 93 |
| Dark | 188 - 194 (or cooler) | 87 - 90 (or cooler) |
Espresso pressure settings and pressure profiling
We won’t go in-depth on espresso pressure settings and pressure profiling as it can be quite complex. If you have a machine that can monitor your pressure by a gauge or a digital readout (like the Decent Espresso machine), this can help pinpoint how well your espresso puck preparation turned out.
Most home espresso machines will try to push to and hold 9 bars of pressure during the brew. You may have a 6 – 10 second presaturation phase where the bars of pressure is slightly lower and then a full ramp up to 9 bars throughout the remainder of the brew.
What you need to look for, and if you have a pressure gauge, is how steady your machine hovers around 9 bars of pressure (assuming you are not pressure profiling or using a machine that pushes below or above this mark). If you know your machine should hit a steady 9 bars of pressure but you see the following, you can assume one of two things:
- Pressure gauge is under 9 bars of pressure: If your machine cannot hit a steady 9 bars of pressure, it may be due to channeling in your puck, underdosed basket or grind size being too coarse.
- Pressure gauge is above 9 bars of pressure: Your machine may be struggling to penetrate the coffee puck, you either made your coffee puck too thick by adding more grounds than recommended for your basket, or you ground too fine.
Your pressure gauge is your friend and tells you lots of good information that can be used to better your espresso puck preparation. If you are looking for a good home espresso machine, look for one that can display the machine’s pressure!
Locking in your portafilter
While this is quite a simple step, it is worth calling out to ensure that your portafilter locks in place fully. There are a few notes worth mentioning here:
- Lock your portafilter in completely to ensure proper pressure build-up. If the portafilter is placed too loosely, you will lose pressure.
- Do not overtighten your portafilter, as you will quickly wear out the rubber gaskets alongside the group head.
Monitoring espresso flow rate and total time
Now we are at the point where you chose your volumetric settings, locked in your portafilter, and you are off to the races and brewing!
Now, let’s not get too excited! This is a great time to monitor your flow rate for any inconsistencies in your previous steps.
Let’s say, your recipe calls for 18 grams of ground coffee pulled at a “normale” ratio of 1:2 (1 gram of coffee for every 2 grams of water) and finishing at 35 seconds.
To hit your 36 – 40 grams of espresso liquid in 35 seconds, you need a flow rate of roughly 1.25 – 1.5 grams per second post the preinfusion stage.
What you’ll find is, the first 6 – 10 seconds will be your preinfusion, where your machine saturates the puck at a lower pressure. You might find some espresso drip out before the completion of this stage but usually not more than a few grams.
Once your preinfusion is complete, you should be looking for a flow rate of roughly 1.25 – 1.5 grams per second to hit the finishing time of 35 seconds.
The above is a standard end time and flow rate, not a be-all-end-all suggestion. Certainly, lean on the recipe you are following, or if the coffee roaster you purchased from has suggested times, use those!
The above images shows flow rate monitoring with the Decent Espresso Machine.
Early blonding, tiger striping, and other indicators for channeling
You should keep an eye out for a few watch-outs during the brewing of your espresso.
Early blonding: As a shot of espresso is prepared, its color transitions from dark to light, referred to as blonding. If espresso blondes too early, this could mean there were issues with puck preparation and potential channeling in your shot where water flowed too quickly through the grounds. An espresso that blondes too early will lack crema, and often be an under-extracted and sour-tasting shot.
A shot that stalls: A "stall" in espresso brewing occurs when the grind size is too fine or your packed too much coffee into the basket, making it difficult for the pump in the espresso machine to generate enough pressure to pass water through the settings. To avoid this, it's recommended to use the correct amount of coffee in your portafilter basket and potentially grind more coarse.
Tiger Striping: Tiger striping refers to the visual appearance of espresso shots, where dark and light stripes or markings are visible in the crema. This is believed to indicate uneven extraction, with darker stripes indicating slower extraction and lighter stripes indicating faster extraction. However, some have noticed methodological errors in studies that have explored this concept, and it's unclear how much micro-channeling has on the flavor of the shot. Ultimately, the shot’s taste matters most, with the ideal extraction being high but not too high to ruin the flavor.
Evaluating your espresso (Phase 3)
Now comes the fun part, or maybe not so fun part if the prior steps turned out to be a disaster!
Regardless of how your shot turned out, it is important to taste it, even knowing it didn’t hit the parameters you were looking for.
For example, your shot came gushing out of the portafilter at an unreal flow rate, and the shot time finished in 15 seconds. Taste this shot! You will understand what a fast-flowing shot that blondes super early tastes like. It is a great learning experience and gives you a better understanding of what a quick shot tastes like versus one that may stall out of having a super slow flow rate.
We have all been there where a shot stalls out, goes beyond the intended time or shuts off completely before hitting the intended end weight. Your first instinct is just to hit the shot button and let it brew for another few seconds to get out the volume needed for your drink but avoid doing this, taste the shot as it is the understand what a stalled shot does to espresso.
As you evaluate the taste at each of these mishaps, take notes (mental or written) until you get to your recipe’s intended time and volume.
What happens if the coffee doesn’t taste the way you thought it should
Once you reach your intended brew weight and time, you might find that the taste does not meet what you were looking for or what the roaster indicates the coffee should taste like.
A few things that can be impacting this outcome:
Water: The water you use during brewing can significantly influence the taste of your espresso. Always use good quality spring water and even test using other waters (lower or higher in hardness and alkalinity).
Temperature: You brewed the coffee at a high or low temperature. Try adjusting the temperature on your machine but stay within the range suggested by roast type.
Age of the coffee: The age of the coffee can also drastically change the outcome of your espresso. If the coffee tastes carbony and lacks the aromatics and sweetness you imagined, you may be brewing it too close to the roast date. If the espresso lacks clarity and tastes flat, it may be way past the optimal brewing time.
Other ways of evaluating your espresso
There are other ways of evaluating your espresso such as visual inspection (covered during the extraction portion of this article) or using a TDS meter that reads out the Total Dissolved Solids of your brewed espresso.
TDS readings only tell us so much, and we don’t suggest most go down this path when brewing espresso. A higher TDS does not necessarily mean you will have a better-tasting espresso; it just tells you there is more in the cup. There are certainly correlations there, but it is like telling someone a high-grown coffee is always a better-tasting coffee than one grown at a lower altitude (I think this is a good comparison!).
Exploration: Try new coffees and water
We added try new coffees and other waters to the exploration phase as an obvious but helpful reminder that once you perfect your recipe for a certain espresso, try brewing it with a different water to see how that impacts the taste. Or go out and try different roast levels or processing methods and how those factors influence the taste in your cup.
As always your espresso beans should be freshly roasted and not pre ground coffee - but if you made it this far you definitely already know that!
Frequently Asked Questions
What is the Espresso Flywheel?
The Espresso Flywheel is a framework from Coffee Bros. that breaks down espresso brewing into three phases: Prep, Extract, and Evaluate. Each phase directly influences the next, so strong puck preparation leads to better extraction and a more satisfying final cup.
Why is espresso puck preparation so important?
Puck preparation is the most important step in the process because everything you do before locking in the portafilter directly shapes your extraction and taste. Steps like WDT distribution, tamping evenly at 30 pounds of pressure, and using paper filters all contribute to a consistent, well-extracted shot.
How much coffee should I use in my portafilter basket?
Your dose should match the basket's graded capacity, typically 16-22 grams for a double shot. Underdosing or overdosing affects headspace and pressure, both of which can lead to poor extraction.
What grinder do I need for espresso?
You need a burr grinder specifically marketed for espresso, as it must be capable of grinding fine enough and consistently enough for proper extraction. Look for features like stepless grind adjustments, low retention, and conical or flat burrs, with good options available from under $300 up to $500 and beyond.
What water should I use when brewing espresso?
High-quality spring water is a great starting point, since water makes up 88 to 90 percent of what is in your cup. Balanced water in terms of total hardness and alkalinity will produce the best results, and experimenting with mineral-enhanced options like Third Wave Water can further improve flavor.
What brewing temperature should I use for espresso?
Match your brew temperature to your roast level: light roasts perform best at 199-205 degrees Fahrenheit, medium roasts at 194-200 degrees, and dark roasts at 188-194 degrees or cooler.
What are the main espresso shot types and their ratios?
The three main shot types are ristretto (1:1 to 1:1.5 ratio), normale (1:2 to 1:3 ratio), and lungo (1:3 to 1:4 ratio). Choosing the right ratio depends on your taste preference, roast level, and whether you plan to add milk to your drink.
What does early blonding mean and why does it matter?
Early blonding occurs when the espresso transitions from dark to light too quickly during extraction, often signaling channeling or poor puck preparation. A shot that blondes too early will typically be under-extracted, lacking crema and tasting sour.
Should I ignore the golden rule of espresso?
Yes, Coffee Bros. recommends ignoring the traditional 25-second rule because the ideal brew time varies with your shot type, roast level, and recipe. Focus instead on hitting your intended extraction time and weight for the specific recipe you are following, and adjust one variable at a time.
What type of coffee roast works best for espresso?
Any roast level can work for espresso, depending on your recipe and drink type. Light roasts shine as straight shots or in smaller milk drinks at higher ratios, while medium and dark roasts are better suited for larger milk-based drinks where a bolder flavor is needed to cut through the milk.