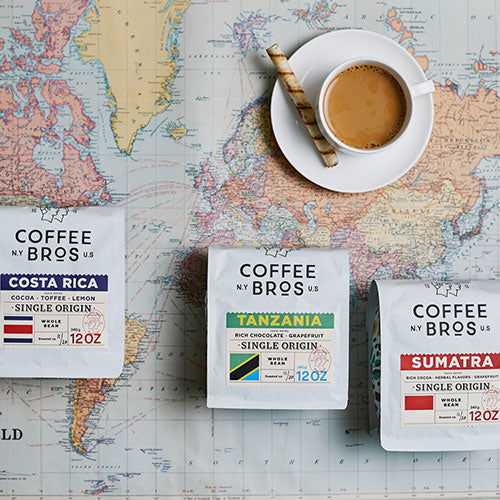
How to fix an espresso shot that pulls too slow or too fast
Introduction
99% of the issues concerning the flow rate of your espresso start before you lock in your portafilter and hit the brew button; that is, of course, your machine’s pump is in working order!
We are here to quickly break down the top reasons we’ve seen causing many of our customers to have poor flow rates (fast or slow) when brewing espresso.
Before we get started, we have written some helpful guides around espresso brewing that are worth looking at after you read this one:
Coffee Subscription Deal
Subscribe to Coffee Bros. coffee for 25% off when using code "FTSUB25" at checkout
Table of Contents
What's causing your espresso shot to flow too fast or too slow
- Incorrect basket size and under/overstuffing your basket
- Your equipment needs cleaning
- Use a grinder that is graded for espresso
- Calibrate your grinder
- Weigh your ground coffee
- Break up clumpy grounds
- Fix your tamping pressure
- Dial-in your grinder
- Check your brew pressure
- Pre-infusion and puck saturation
Incorrect basket size and under/overstuffing your basket
To us, the wrong basket size and under or overstuffing your basket are the number one cause of faulty flow rates when brewing espresso at home. While the rest of the suggested issues will be in order from grinding to brewing, we put this first as it is one of the biggest culprits.
Being that most of our customers are home baristas, the machines each of you use vary from sub $500.00 machines to those in the thousands. Each machine has a set of standard accessories, usually a single and double basket, but the sizes of those baskets (how much ground coffee they can hold) will vary for each machine.
Most double-shot espresso recipes online suggest upward of 18 – 20+ grams of coffee, and often most users’ machines out-of-the-box accessories cannot hold that much (we recommend buying a VST 18 or 20-gram precision basket as your first upgrade).
Check your machine manual or the manufacturers' website, as double shot baskets range from 14 – 22 grams. Each basket is graded based on capacity (for example, 20-gram basket) and circumference (for example, 58mm), corresponding to the espresso machine's group head size.
For instance, a 58mm group head machine requires a 58mm portafilter and basket. Filling the basket with the correct amount of coffee is essential, as adding too little will change the headspace and negatively impact your brew. Conversely, overfilling the basket will create a thicker puck, making it more difficult for water to penetrate during brewing. Stick to your basket's graded range (+ or - 2 grams) to achieve a well-balanced espresso shot.
As mentioned earlier, look for a high-quality basket graded 18 – 20 grams as your first upgrade for your machine. The correct coffee dose is usually the biggest culprit for causing espresso extraction issues.
Your equipment needs cleaning
This one is quite simple, but keep your equipment clean!
Your equipment should always be cleaned after every brew from the group head to the basket. Removing your basket from the portafilter occasionally and giving it more love than rinsing out after you brew a shot is also helpful.
The group head should be wiped down after every few brews as residual coffee can build up on the shower screen, impacting your brew's flavor and flow rates.
Adding a puck screen (metal mesh filter or paper filter) on the top and bottom of your espresso puck does help keep both your group head and basket much cleaner (among other things).
Use a grinder that is graded for espresso
We run into this all the time, but to brew espresso, you need equipment that grinds fine enough to allow your machine to maintain proper pressure and flow rates to hit ideal espresso recipes. Consistency is also key here; while I am sure you can grind super fine using a blender (please don’t), espresso needs constant adjustments, and consistently hitting certain fineness is impossible without a proper espresso grinder.
Espresso grinders range from $199.99, like the Baratza Encore ESP (a great entry-level grinder), to commercial espresso grinders that cost several thousand dollars. The difference between the inexpensive and more expensive models comes down to motor strength, build quality, burr size, adjustment type (infinite or set), and other features like grind-by-weight, digital displays, and more.
We highly recommend purchasing a good espresso grinder to brew great espresso.
Calibrate your espresso grinder
Some grinders must be calibrated out of the box, while others come ready to grind without additional steps. Calibration may also be needed over time as constant use of a grinder slowly shifts the distance in your burrs, causing what used to be a fine setting of 3 is now a coarser setting at 5.
Calibrating a grinder means you are adjusting the burrs back to a state where when at a setting of 0, your burrs are pretty close to, if not touching, each other. The goal here is always to know that when your grinder is set to 0 or close to 0, the burrs are almost touching. From the 0 settings, upward will then always remain consistent moving forward. Again, some machines become uncalibrated, all grinders must be recalibrated over time, and settings shift due to constant use.
Suppose your grinder may need recalibration as your coffee is not grinding fine enough anymore, and something seems off. In that case, do a quick YouTube search of the make and model or check the manufacturer’s website, as the differences between how each grinder gets calibrated are drastically different.
Some grinders, like the Sette 270wi, can add a “shim” below the conical burr, which changes the spacing and allows the machine to grind even finer than it would off the shelf. Other grinders, like the built-in grinder on some Breville machines, allow you to adjust the internal dial to get a finer grinder.
Example of grinder adjustments to grind finer:
Weigh your ground coffee
Now that your basket size is in check, and you understand how much it can hold, weigh your ground coffee each time. As you will see in later suggestions, we recommend dialing in your espresso (which often means changing your grind size to hit specific brew parameters) daily or every few days. As you change the grinder settings toward finer or coarser, the amount of coffee that comes out during the same allotted time will change (assuming you are using a grind-by-time grinder). These minor adjustments are essential to hit your brew parameters but may alter how much espresso grounds reach your portafilter. Be consistent, always measure your grounds, and use the correct basket size to take one factor from the equation around what might be causing your poor espresso flow rates.
Break up clumpy grounds
Not all grinders are created equal and clumpy grounds may be a result of a poorly designed grinder or one that lacks a declumper in the shoot of the grinder. Most espresso grinders have a piece of plastic, rubber, or metal at the beginning of the shoot to help prevent static electricity, which causes grinds to clump up together. These declumping parts must be cleaned often as they gunk up quickly, causing even more clumping issues and static electricity.
Clumpy grounds that are not broken up and distributed in your portafilter will ultimately impact your flow rates. Remember, consistency is vital when it comes to grind particle size, and water will find any inconsistencies which can create channeling.
Here are a few things you can do to help with clumpy grounds:
- Use the Ross Droplet Technique and spray your coffee grounds with water before grinding.
- Keep your declumper clean.
- Use a WDT tool to break up and distribute your grinds evenly.
- Use a puck screen at the top of your portafilter to help reduce channeling.
Ideally, you would do all the above to reduce clumpy grounds and channeling, and some higher-end grinders can do without the RDT and even WDT – some of these elements may be overkill in a commercial setting.
Tamp with the correct amount of pressure
If you nailed the previous steps and have an evenly distributed puck of coffee, then tamping should be a breeze! Always apply even 30 lbs of pressure when you tamp the espresso grounds.
The optimal tamping pressure is roughly 30 pounds, where you hit “maximum density,” where the coffee grounds cannot be compacted further.
The reason why 30 pounds of pressure is suggested is due to the “maximum density” concept. Once you reach maximum density, your job is complete. Further, tamping at 35 or 40 pounds of pressure adds stress to your joints and doesn’t further impact your brew.
Issues arise when you tamp too soft, creating inconsistencies in the puck, often causing channeling. You want to take tamping pressure from the equation on why your espresso brews like “x” or tastes like “y”. Always tamp to 30 pounds of pressure or use a spring-loaded tamper that always hits the same force each time.
Dialing in your grinder
Dialing in your grinder is much different from calibrating your grinder, and both are necessary steps to brewing the perfect shot of espresso though the latter needs to be done far less frequently.
Dialing in your espresso refers to the grind setting changes you might need to make after purchasing a new bag of coffee. The coffee type, roast depth, and age of the coffee all impact the grind setting needed to hit a specific brew recipe.
Let’s take a typical 1:2 brew recipe of 18 grams of espresso grounds to 36 grams of espresso liquid in 30 – 36 seconds. Upon purchasing a new bag of coffee, even if it is one you brewed previously, your grinder will need to be adjusted to hit the brew parameters of 1:2 in 30 – 36 seconds. If it is a coffee you use each week, you will begin to understand what grind setting is needed on “x” days after the roast date and how that coffee might react as it ages.
Our experience shows that coffee tends to need a coarser grind if it is fresh off of roast and has the coffee ages, and a finer and finer grind is needed. To make things a bit more complicated, lighter roasts need a finer grind than darker roasts, and coffees of different processing methods also react differently when initially “dialing in” for the first time.
With time and experience, you will build a general idea of a good setting on your grinder for a new bag of coffee and what might be a good setting for a coffee 14+ days past the roast date. A lot of trial and error occurs initially, and unfortunately, some poorly pulled shots, but this is a crucial step to get the hang of it. You will need to make these minor adjustments to maintain your brew recipe throughout the life of the coffee. Minor adjustments daily or every few days will have you pulling shots at the intended volume and time.
As always, use the correct coffee dose, grind size, and amount of coffee beans (stick to a recipe with weight and time) and you'll be pulling great shots of espresso!
Your machine is not hitting the ideal brew pressure
Espresso should be brewed between 6 – 9 BARs of pressure or around 130 psi. The significance of pressure in the espresso-making process cannot be overstated. It is a critical element that facilitates flavor extraction and aroma from the coffee grounds as the water passes through them, producing a robust and full-bodied espresso shot.
If your machine has a pressure gauge and you notice that your brew pressure does not reach 6 – 9 BAR post-preinfusion, there may be an issue with your pump, gasket, or a fault O-ring around your brew head. It could also mean you are not locking in your portafilter correctly, or grinding too coarse where the extraction pressure is too poor.
If you are dealing with an older machine, check your gaskets, O-rings, and hope it is a cheaper fix where your pump is not causing the issue.
Pre-infusion and puck saturation
The pre-infusion stage of your brew is when your espresso machine gently saturates the coffee grounds with water under a lower brew pressure before engaging the pump to 6 – 9 BAR. This 2 – 8 second pre-infusion aims to thoroughly saturate your coffee grounds with water to help the remaining brew pass through the grounds quickly and evenly. If you work with a semi-automatic espresso machine, simply engaging your brew level to 45° will engage your pump at a lower pressure for pre-infusion. You are in complete control of the length of pre-infusion, and testing times between 2 – 8 seconds can alter flow rates positively or negatively.
It is important to note that more automatic machines have this feature built-in, and you may be able to alter the time of your pre-infusion through the machine's settings.
If you feel as though your shots are experiencing channeling, then try using a mesh metal puck screen to help the pre-infusion of your grounds occur more evenly. Inconsistently ground and tamped espresso will lead your pre-infusion step to create channeling areas causing your shots to slow faster than intended.