How To Make Espresso At Home For Cheap
Introduction
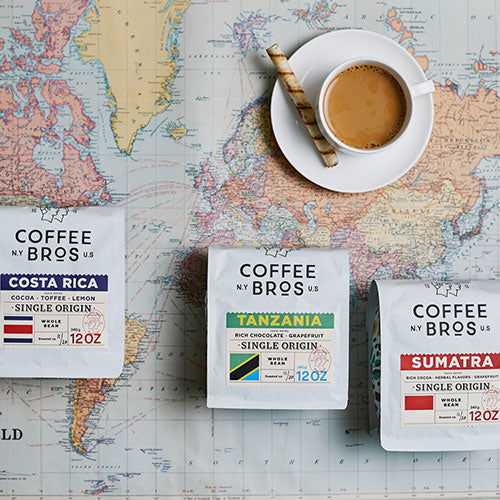
One of the most desired drinks in the coffee world is a beautiful rich espresso and it is a drink that drives most of us to a café because espresso equipment can be costly.
A great home espresso machine can cost upwards of $1,000 and machines that rival café quality can approach $3,000 or more.
The reason why espresso drinks need a specific piece of equipment is due to the pressure needed to craft the beverage. Traditional Italian-style espresso is brewed using 9-bars of water pressure (or 130 pounds of force per square inch) which flows through coffee grounds in a portafilter to create the drink.
What makes espresso unique to other brewing methods comes down to the water pressure that is forced through your “puck” of coffee which extracts flavor compounds such as fats, acids, sugars, and plant fibers. Coffee acids and fats are the first compounds extracted, with acids providing a sour taste, and light aromatics such as floral and fruity flavors are also extracted. Fats, which add body, are extracted at the same time and are hydrophobic, easily washing out of ground coffee. They are important for espresso and contribute to the crema. Sugars follow and provide sweetness, but take more time and energy to dissolve. Plant fibers holding the coffee together break down last and add a dry, bitter taste that should be limited in the final cup. A few of these fibers provide bite, but too much can ruin the coffee.
The pressure also pulls oils from the coffee producing a foam-like texture that sits on top of the espresso called “crema.” Crema is rich, and somewhat bitter, but is a key component of your espresso drink that adds body and texture. Machines that are unable to reach specific temperatures or levels of pressure will have a difficult time creating a beverage with crema.
Okay, now you know a bit about espresso brewing and why pressure and temperature are so important. Machines that can consistently produce high levels of pressure and consistent temperatures end up being quite expensive, but did you know you can get pretty darn close to an expensive-tasting espresso for under $100?
We put together a list of 5 options for crafting espresso at home for cheap and with the most expensive option being $300!
New to espresso terminology? Check out our 100+ term coffee glossary!
How To Make Espresso At Home: Table of Contents
- Method 1: Wacaco Nanopresso ($70.00)
- Method 2: Flair Espresso ($325.00)
- Method 3: Moka Pot ($30.00)
- Method 4: Turkish Coffee Maker ($30.00)
- Method 5: Steepshot ($70.00)
Wacaco Nanopresso
If creating the perfect espresso requires precise pressure control, what options are there for those who don't want to invest in a costly home espresso machine? The answer lies in the innovative Wacaco Nanopresso, a compact and affordable handheld espresso brewing device that offers an accessible solution. With its price point under $60.00, the Wacaco Minipresso has been designed to provide espresso lovers with an easy and convenient way to enjoy their favorite coffee drinks.
The Wacaco Nanopresso operates in a similar fashion to traditional espresso machines, by using pressure to force water through a compact puck of finely ground coffee. The key difference lies in the method used to create the necessary pressure. The Wacaco Nanopresso generates pressure through manual labor, using the user's own hand to apply pressure to the knob. With a recommended 28lbs of force applied to the knob, the Wacaco Nanopresso can reach a maximum pressure of 18 bars, which is sufficient to produce a rich, full-bodied espresso with a creamy crema.
How to brew with the Wacaco Nanopresso:
To ensure optimal results when using the Nanopresso, there are several steps you should follow before brewing. First, it's recommended to run a brewing cycle using only hot water, without any coffee, to minimize heat loss. Additionally, preheating your cup with hot water can prevent your espresso from being too cool and weak due to under-extraction.
- Add ground coffee: When you're ready to brew, add 8 grams of finely ground coffee to the filter basket, which can be done easily using the provided scoop. After filling the scoop, simply place the filter basket over it and flip it over so the coffee falls inside. Then, tamp the coffee down firmly using the bottom of the scoop and brush away any excess grounds.
- Screw filter basket onto body: Next, cover the filter basket with the portafilter and place it on top of the main body of the Nanopresso. Screw the nozzle tightly to the main body to prepare for brewing.
- Heat water: To prepare the water for brewing, add boiling water to the water tank, which can hold between 50 to 80 ml of water. Using less water is recommended for darker roasts and ristretto shots, while more water is suitable for lighter single-origin coffees. Once the water is added, screw the main body tightly to the water tank, which fits right below.
- Pump the Nanopresso knob: To pull your espresso shot, start by unlocking the piston by turning the knob until the espresso pump pops out from the body. Flip the Nanopresso over a cup and press the pump once per second. After eight pumps, the espresso will begin flowing, so continue pumping until all the coffee has exited the brewer.
Flair Pro 2
The Flair Espresso machine is a manual brewing device that produces delicious, creamy espressos with ease, much like the popular Wacaco machine. However, the Flair Espresso is different in that it boasts a higher quality build and additional features that contribute to its higher price point. For example, it comes with a pressure gauge that is particularly useful in achieving the perfect shot of espresso. By indicating the amount of pressure generated with each shot allows for you to make adjustments to grind size and tamp to home in on the perfect output.
Additionally, the Flair Espresso features a larger basket capable of holding 16 to 24 grams of coffee, a larger water tank for extended brewing sessions, and stainless-steel components that contribute to temperature stability. This last feature is particularly important in the brewing process, as temperature plays a critical role in the quality and flavor of the espresso. By using stainless-steel for the water reservoir, portafilter, screen, and spout, the Flair Espresso is able to maintain a consistent and optimal temperature throughout the brewing process, leading to a rich and flavorful espresso with excellent body and crema.
How to brew with the Flair Pro 2:
-
Flair Preparation:
- (a) Insert the post into the base and place the drip tray onto the base.
- (b) Disassemble the brew head.
- (c) Using the dosing cup, move the plunger (the part inside the brew head) into the correct position, which should be opposite the red o-rings inside the cylinder.
-
Bean Preparation:
- (a) Always use a burr grinder to grind at least 16 grams of freshly roasted beans.
- (b) Attach the funnel to the top of the portafilter and fill it with fresh grounds.
- (c) Lightly tamp the grounds with the tamping cap below. (d) Remove the funnel and place the screen on top.
-
Brew Head Preparation:
- (a) Put the preheat cap onto the bottom (o-ring side) of the cylinder and fill it with just boiled water. Leave it for at least 30 seconds.
- (b) Pour out the preheat water from the cylinder and remove the preheat cap.
- (c) Place the cylinder on top of the portafilter.
-
Adding Brew Water:
- (a) Pour your near-boiling brew water (194 - 204˚F) through the top of the cylinder. Fill it until the water is visible in the well. Do not underfill!
- (b) Attach the stem by pressing it down into the well. Don’t dump excess water.
- (c) Rotate the gauge for best visibility.
- Brewing with Flair: Place the brew head onto the Flair and lower the lever to brew. For spouted brewing, "click" the spout on the bottom of the portafilter. The brewing time should be between 35-45 seconds at 6-9 BAR pressure. If this is not the case, check your grind and dose.
Moka Pot
Our next few options may not have the necessary pressure to make an authentic espresso, but they are still great brewing options that are affordable and can get you close to that flavor you crave.
Up next is the Moka Pot, which produces a full-bodied and robust coffee with a heavy mouthfeel, giving you that similar espresso taste.
How a Moka Pot works:
To prepare coffee with a Moka pot, begin by filling the base with water and packing finely ground coffee into a small chamber situated at the bottom of the pot. Place the Moka pot on a heat source, like a burner on a stove, and wait for the water to heat up. As the water begins to boil and turn into steam, pressure starts to build up (about 1.5 bars – far less than the standard needed for espresso). Once the pressure reaches a certain level, the water searches for an exit and gets pushed through the coffee and into the main chamber of the Moka pot. The coffee is considered ready once all the water has been forced through the coffee or boiled away.
How coffee from a Moka Pot tastes:
The coffee produced by a Moka Pot is characterized by its strong, sharp flavor and intense body, similar to espresso. The brew is thick and concentrated, resulting in a delicious taste. However, it can be challenging to get the perfect brew as it's easy to under-extract or over-extract the coffee.
While the Moka Pot can produce a great cup of coffee, it cannot compare to an espresso machine in terms of consistency, quality, and control. This is mostly due to the challenge in controlling quality from one brew to the next. Without consistent pressure, the Moka Pot can produce coffee that is either bitter or weak, and there isn't much room for troubleshooting between brews.
How to brew with the Moka Pot:
- Preheat Water: Begin by preheating the water by bringing kettle water to a boil and removing it from heat. This is done to prevent the moka pot from overheating and giving a metallic taste to the coffee.
- Grind Coffee: Grind your coffee on a drip coffee setting to a fine texture, about as fine as table salt. You'll need about 15 to 17 grams (or around 2.5 tablespoons) of coffee to fill the filter basket of a 4-cup Bialetti moka pot.
- Add Water: Add the heated water to the bottom of the brewer, filling it up to the line.
- Insert Filter: Insert the filter basket into the brewer bottom.
- Add Coffee: Fill the basket with coffee, slightly mounded, and level it off with your finger. Clean any loose grounds on the top edge of the filter basket.
- Screw on Body: Screw the top and bottom together, making sure not to over-tighten. Use hot pads to avoid burning yourself.
- Place on Stove: Place the brewer on the stove, using moderate heat and ensuring that the handle isn't exposed to the heat. Keep the top lid open.
- Wait for Steam: The coffee will start to come out, and you'll hear a puffing sound and see a rich-brown stream that gradually becomes lighter in color. Once the stream becomes the color of yellow honey, remove the brewer from the heat source using hot pads and close the lid.
- Stop Extraction: To prevent the coffee from getting a metallic taste, wrap the bottom of the pot in a chilled bar towel or run it under cold tap water to stop extraction.
- Pour and Enjoy: Once the coffee stops bubbling out, pour it into cups or a carafe. Depending on your preference, you may want to dilute it with hot water. The goal is to obtain a small amount of highly concentrated and rich coffee.
Turkish Coffee Maker
An alternative brewing method to espresso is the Turkish Coffee Maker, which doesn't generate pressure during the process, but still produces a thicker and heavier body that some people associate with espresso.
The origins of Turkish coffee are in Yemen, and it was introduced to Sultan Suleiman I in the 16th century, becoming popular among the wealthy and noble in the Ottoman Empire. Turkish coffee became widely available by the mid-1550s, and coffee houses similar to today's coffee shops were established. Turkish coffee has a strong and condensed espresso-like taste, and it is typically served with sugar and milk to add sweetness. The grounds are left in the cup, which contributes to the strong taste and adds bitterness and grit. When stirred, the coffee is a little thick, and when brewed in a cezve, foam will appear on top. Water or milk can be added to balance the strong taste.
How to brew with a Turkish coffee maker:
- Mix Ingredients: Place desired amount of sugar, water, and Turkish coffee in a metal Turkish coffee pot (Cezve).
- Combine Ingredients: Use a small spoon to briefly stir the mixture until just combined, then place the pot on the stovetop.
- Bring to boil: Slowly bring the coffee mixture to a boil over medium heat. This should take about 3-4 minutes, so keep a close watch.
- Transfer foam: As the coffee warms, you will see a dark foam building up. Once it's closer to boiling, use a teaspoon to transfer some of the foam into each of your two Turkish coffee cups.
- Bring back to boil and distribute: Return the coffee pot to the stovetop. As the coffee comes to a boil, pour half of the coffee into the cups over the foam.
- Finish the brewing process: Return the coffee pot to the stovetop and boil the remaining coffee for an additional 15-20 seconds. Pour the rest of the coffee into the cups until they are filled to the rim.
- Serve and Enjoy: Serve the coffee with water and Turkish delight.
Steepshot
On first glance, this Norwegian invention bears some resemblance to the AeroPress, but there are some differences. Instead of using a plunger, the pressure that builds up when the lid is screwed on is used to force the hot water and coffee through a fine mesh filter. The kit includes two filter sizes: one with 100 microns and another with 60 microns. We prefer the latter because it produces a slightly cleaner cup. If you want an even cleaner cup, you can use an AeroPress paper filter, but we find that it produces a less interesting result. The brew time is much longer, and you lose the unique oily mouthfeel.
How to brew with the Steepshot:
- Assemble: Follow the manual to assemble the Steepshot brewer and insert the 60-micron filter.
- Grind Coffee: Grind the coffee coarsely, but experiment with different grind settings to achieve the desired taste.
- Add Coffee: Pour the coffee into the thermal chamber of the Steepshot brewer.
- Boil Water: Boil water, then let it cool slightly until it is almost boiling.
- Add Water to Brewer: Pour 250 grams of hot water over the coffee in the thermal chamber, then quickly screw on the lid tightly.
- Shake: Gently shake the brewer from side to side to ensure that the water and coffee are mixed.
- Flip and Release: After one minute, flip the brewer over, wait ten seconds, and then open the valve to release the coffee into your cup.