Introduction
Are you just getting into espresso or looking for a few tips on how to brew the best espresso shot, well this guide is for you. We came up with 19 tips for espresso beginners and those looking to improve their espresso game.
The guide tried to go in the most logical order in terms of pre-brewing steps all the way down to post-brewing and keeping your equipment clean, etc.
We have also written a ton about espresso recently and one more in-depth guide will take you through all the steps needed to brew the best espresso at home. We call it the espresso Flywheel, and after reading the below quick tips, we suggest jumping into that guide!
Tips on how to make the perfect espresso
- Know your espresso machine
- Understand espresso brew ratios
- Use precision-grade espresso baskets
- Only use freshly roasted coffee
- Understand how different roast types might alter brewing and grinding parameters
- Use a coffee that is ideal for your drink preferences
- Know the differences between flat and conical burr grinders
- Use a grinder that is graded for espresso
- Grind your coffee on demand
- Use good and repeatable espresso puck preparation
- Understand the nuances in brewing temperature
- Use good quality water
- Properly warm up your espresso machine
- Weigh your coffee grounds, espresso liquid, and record shot times
- Understand what your pressure gauge is telling you
- Know the brewing issues based on visual cues
- Be like a scientist and only change one variable at a time
- Don't worry about the golden rules of espresso; rely on taste
- Keep your espresso machine and equipment clean
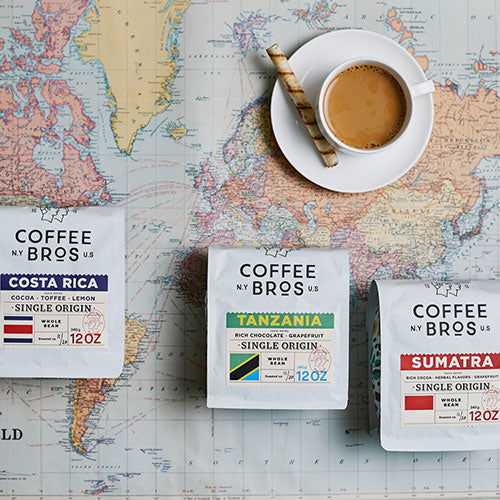
Coffee Subscription Deal
Subscribe to Coffee Bros. coffee for 25% off when using code "FTSUB25" at checkout
Recommended Reading: What are the best espresso machines on the market
1: Know your espresso machine
Understanding the ins and outs of your espresso machine can save you a lot of trouble brewing inadequately from the start. For example, there are vast differences in the stock portafilter and basket sizes from an entry-level machine like the Breville Bambino Plus to a prosumer machine like the Rocket Espresso Giotto Type V. Prosumer machines typically all use 58mm portafilters and baskets. In comparison, entry-level machines opt for smaller 53-54mm baskets. While nothing functionally wrong with a smaller basket, note that some stock baskets with entry-level machines cannot adequately fit more than 16 – 18 grams of espresso.
Further, it is sometimes tricky to find espresso accessories and tools for smaller portafilters, though you can still find IMS precision baskets for the Breville line of products. Other differences in entry-level machines compared to more sophisticated espresso machines include little to no temperature control, pressure gauge, lack of temperature stability, and the inability to brew and froth milk simultaneously.
2: Understand espresso brew ratios
Espresso brew ratios are the coffee grounds used versus the final extraction yield or liquid in your cup. For example, a double espresso calls for a 1:2 ratio, meaning that for every 1 gram of ground coffee in your espresso portafilter, you aim for 2 grams of espresso yield in your cup. A standard double espresso recipe would call for 18 grams of finely ground coffee in your portafilter, yielding 36 grams of espresso in your cup and typically within 30 – 35 seconds. Understanding brew ratios will allow you to home in on any issues you may be experiencing with your shot. Then, change one variable, like grind size, to fall within the brew ratio parameters.
3: Use precision-grade espresso baskets
Precision-grade espresso baskets are crafted in a way with, you guessed it, precision in mind. A precision basket has perfect and evenly placed holes, which help deliver consistent extraction and performance over a wide range of concentrations and reduce any sediment. An example of a precision basket would be one from IMS or VST graded by gram capacity and can hold plus or minus 1 gram from what the basket states.
For example, VST sells baskets graded as 15g double European, 18g double, 20g competition, 22g triple, and 25g triple+. A VST basket graded as an 18g double will perform optimally in a range of 17 – 20 grams of coffee. Non-precision grade baskets, like the ones that may come with your machine, can perform poorly compared to a precision basket. A $35.00 investment will drastically improve your espresso shots and ensure you are brewing within the proper gram range.
4: Only use freshly roasted coffee
This one should be a no-brainer, but always buy freshly roasted coffee (within 3 – 7 days of roasting). If kept as whole bean, coffee flavor peaks 3 – 4 weeks past the initial roast date and then slowly declines. If you purchase pre-ground coffee beans, you will see a decline in peak flavor days after purchasing them.
5: Understand how different roast types might alter brewing and grinding parameters
To no surprise, every coffee is vastly different from roast depth (light, medium, dark) to processing method (washed, honey, natural) to a multitude of other variables that all impact how you dial in your espresso. Dialing in your espresso refers to the fine-tuning process that a barista carries out by adjusting the grind size of the coffee beans, preparing the puck, and tamping to achieve the optimal extraction time for the best-tasting shot. This process involves finding the right balance between coarser or finer grinds, puck preparation, and tamping to produce the perfect shot. A lighter roasted coffee typically requires a finer grind than one roasted medium to dark.
Further, a coffee roasted dark may perform best at a standard recipe of 1:2 grounds to liquid and cooler brewing temperatures. While a light roast may work best when brewed hotter and at a wider ratio of 1:3 or 1:4. The significant takeaway is that don’t think every coffee should brew the same using your previous grind settings, temperature, or brewing profile. Lean on the coffee roaster to tell you where a good starting point might be, or use general assumptions like grinding coarser and brewing at lower temperatures for dark roasts.
Finally, find what works best for you and your test preferences and carry that over to other coffees you may try.
6: Use a coffee ideal for your drink preference
If you enjoy your espresso in larger milk-based drinks like lattes and cappuccinos, opt for medium to darker roasted coffees to help cut through the milk. For those who enjoy espresso with a splash of milk, think cortados or macchiatos (literally a dab of frothed milk), then your coffee bean choices widen a bit more. Finally, if you enjoy drinking espresso straight and maybe enjoy brightness and acidity in your coffee, opt for light-roasted coffee and open up the brew recipe to 1:3 or 1:4.
7: Know the difference between flat and conical burr grinders
If looking at espresso in a spectrum of flavors of bold, heavy body, and chocolatey to the left and fruit-forward, acidic, and lighter bodied to the right, conical burr grinders tend to produce cups that fall on the left side of the spectrum while flat burr grinders often fall to the right side. Knowing this, you might find lighter roasted coffees lack the clarity and acidity you expect when grinding with a conical burr or the heavy body and chocolate notes of a dark roast when grinding with a flat burr grinder. Knowing which camp you tend to fall into, purchasing coffee best suited for your grinder will help you better chase that perfect cup of espresso.
That said, as I write this blog, I am drinking a dark roasted espresso that was ground with a flat burr grinder (Atom 75, to be exact), and the results were great. Where you might see the above generalizations be more often accurate is when dealing with built-in or lower-cost conical grinders that again tend to fall on the left side of the spectrum.
As you graduate to higher-end grinders, both conical and flat, you’ll see a broader range of burr quality and burr types to suit your brewing preferences. Some manufacturers like Mazzer will produce flat burrs specifically for brighter coffees or ones built for the darker traditional Italian espresso.
8: Use a grinder that is graded for espresso
This question frequently arises, and it's an area where many people have some misconceptions. Unfortunately, you cannot use just any coffee grinder for espresso or other finely ground brewing methods like the Moka Pot. This is because espresso brewing necessitates a specific level of fineness in the coffee grind. What does this mean in practice? When making espresso, the coffee must be ground within a specific range and compressed into a "puck." Pressurized water, typically at around 130 pounds per square inch, is forced through this compacted coffee. If ground to the correct fineness, the result is a consistently flowing espresso shot that brews for approximately 30 to 40 seconds.
Certain coffee grinders may claim to cover a broad spectrum of grind settings, from very coarse for cold brewing to extremely fine for espresso. However, suppose you are venturing into espresso brewing for the first time. In that case, seeking out a grinder designed explicitly for espresso that can produce grounds within the range of 180 to 400 microns is advisable. While not all grinders may provide specific micron measurements, those marketed as espresso grinders should typically fall within this range.
9: Grind your coffee on demand
To have the freshest, best-tasting coffee, always keep your coffee beans whole and grind on demand. Furthermore, as coffee ages, the grind size will need to be adjusted to hit the brewing parameters you seek when making espresso; this is called dialing in your espresso. Dialing in your espresso requires making minor adjustments to the grinder (sometimes daily) to compensate for the age of the espresso. If you purchased pre-ground coffee, you are stuck at one grind setting, which may be optimal on day one but will slowly degrade as the espresso ages.
10: Use good and repeatable espresso puck preparation
Espresso puck preparation involves everything you do to the coffee grounds before locking in your portafilter and brewing your espresso. This can include using the Ross droplet technique, grinding your coffee, using any WDT methods or tools, adding paper filters or puck screens, and tamping with the proper pressure. The one thing to remember is that once you have your preferred puck preparation, stick to it each time, as changes to your puck preparation will drastically alter how your espresso brews, which will throw off your dialing-in process. As always, and as we will state below, change one variable at a time when adjusting your espresso recipe, including espresso puck prep steps like adding paper filters or puck screens.
11: Understand the nuances in brewing temperatures
Returning to step one, knowing your espresso machine and its limitations with brewing temperature will help you quickly understand what type of coffee might be most optimal for your machine. Some lower-cost espresso machines may have no control over temperature, while higher-priced models can vary brewing temperature quite a bit. If you have a machine with one brewing temperature, note that certain coffee roast levels (light, medium, or dark) might work best. For example, lighter roasted coffees tend to work best brewed hotter than darker roasted coffees, which work best at cooler temperatures.
12: Use good quality water
Use high-quality spring water when brewing your espresso; not only is it better for your machine, but the taste of the espresso will also be improved. We are based in New York, and Poland Spring is a good option. If you want an even better tasting experience, though expensive, Icelandic water makes for a great espresso.
13: Properly warm up your machine
Even if your espresso machine advertises a rapid readiness to brew, it's essential to understand that the group head might not be sufficiently heated for optimal extraction. Preheating your espresso machine for a duration longer than the manufacturer's recommendation is advisable. Additionally, consider pulling "blind shots" to enhance the temperature of the group head before pulling your initial espresso shot.
14: Weigh your coffee grounds, espresso liquid, and record shot times
Weigh everything from your coffee grounds to the brewed espresso liquid and shot times. Not measuring weight or time will make it extremely difficult to make the minor adjustments needed to achieve the perfect espresso shot.
15: Understand what your pressure gauge is telling you
Espresso enthusiasts often seek machines that display pressure readings, and for good reason. The pressure your machine is brewing can signal puck preparation issues, including grind size and amount of coffee grounds used in your basket. If you find your pressure reaching 9 bar and then immediately dropping, you are likely experiencing channeling or have an espresso puck that was not ground fine enough or compacted to the correct pressure. On the opposite side, if your machine reaches and exceeds 9 bar and your shot is stalling, you likely ground too fine or placed too much coffee in your basket (overstuffing), making it difficult for the water to pass through. Having a machine with a pressure gauge is invaluable when evaluating the consistency and quality of your espresso shot.
16: Know the brewing issues based on visual cues
We highly recommend purchasing a naked portafilter, which allows you to inspect an espresso shot as it is brewing visually. Visual cues such as certain areas of the bottom of the portafilter brewing faster than others may signal channeling, and other indicators like early blonding or tiger striping are other things to watch out for. Please read our full blog on how to brew better espresso at home, which details these issues in more depth.
17: Be like a scientist and only change one variable at a time
Treat espresso like a controlled science experiment where making one change at a time to dial in your espresso is mandatory. If you find your espresso brewing too fast or just not tasting great, changing multiple factors like grind size, temperature, and brewing times will not give you the information you seek to understand better which input ultimately affected the output (your espresso shot). Change one variable at a time, assess the taste of your espresso shot, and then make further adjustments.
18: Don’t worry about the golden rule of espresso; rely on taste
The so-called "golden rule" of espresso dictates that if your espresso shot doesn't brew within a 25-second range, then adjustments are necessary. However, firmly establishing a specific brewing time doesn't account for various factors such as the type of shot (single, double, triple), coffee roast level (light, medium, dark), and your intended recipe (ristretto, normale, lungo). Lighter roasts, for instance, tend to perform better with broader extraction ranges and a higher liquid-to-coffee grounds ratio than typical espresso shots. Pulling a 1:3 or 1:4 shot of a lighter roast within the 25-second mark could likely yield a less-than-ideal coffee flavor.
We're conveying here that you should not be fixated on the "golden rule" of espresso because recommended brewing times vary significantly depending on your specific coffee and recipe. The valuable lesson from this rule is that when you fail to achieve your target extraction time, it's best to make one adjustment before considering other changes. Instead of fretting over the golden rule, focus on what brings out the best flavor in the coffee you're working with.
19: Keep your espresso machine and equipment clean
This aspect is paramount and is frequently disregarded. After savoring that exquisite espresso, it may seem as if your task is complete. However, if you wish for tomorrow's espresso to be as delightful, you must also devote some attention to cleaning. Daily, wiping down the shower screen and meticulously cleaning the portafilter with warm, soapy water is advisable. These are two areas where coffee oils accumulate and, over time, can develop unpleasant rancidity. Don’t forget to read your espresso machine manual and understand how often you should describe your machine and the process of doing so. Also, replace any water filters as often as your machine manufacturer recommends.