What You'll Need
Equipment:
- An Espresso Grinder
- An Espresso Machine
- Espresso Puck Preparation tools
- Scale
- Timer
Important Factors
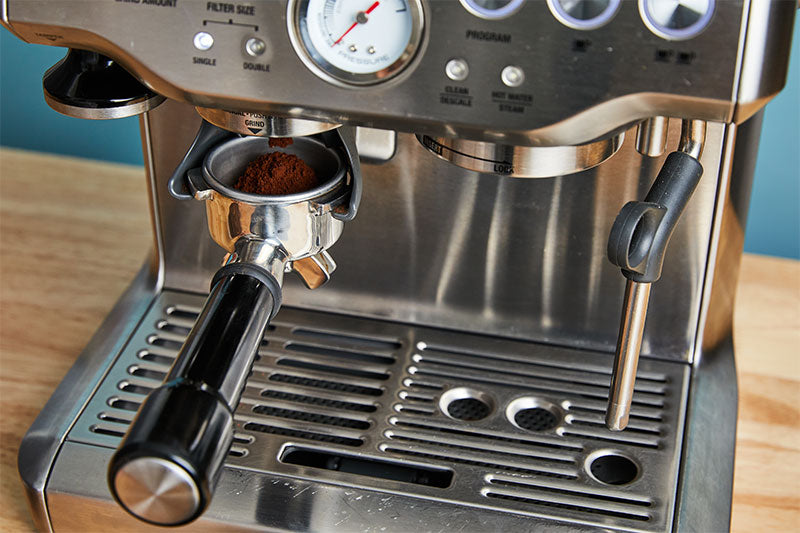
Step 1: Measure and Grind Coffee
Coffee amount: 18 grams
Grind Size: Fine
Brew ratio: Normale 1:2 grams of espresso to brew liquid
End weight: 36 - 40 grams
Every espresso machine is different, as well as every portafilter. Our suggestion for a double shot of espresso at 1 grams in your portafilter basket may not work. Check your basket’s capacity and ensure it can hold 18 grams of coffee. Baskets are rated in grams and can hold + or -2 grams from what they are listed at.
Overfilling your portafilter will create an exceptionally thick puck making it difficult for any water to penetrate it. You will then need to grind coarser, leading to a more sour-tasting espresso. Know your portafilter size and stick to the amount it is graded for.
Espresso Grinding Questions
What grinder should I use for espresso?
Always use a coffee grinder built for the brewing you intend to do. There is a big difference between a coffee grinder meant for drip coffee versus one for espresso. Espresso grinding needs to be very fine and many grinders cannot reach the level of fineness to properly extract an espresso.
When looking for the best grinder for espresso you first need to find a grinder that can grind fine enough to properly pull an espresso shot.
Attributes to look for include:
- Flat burrset at 55mm or larger
- Stepless grind settings for infinite number of grind settings
- Digital control for grind volumetrics and settings for single and double shots
- Low coffee retention, what you put in you should get back out without too much or any retention
- A powerful motor capable of reaching at least 1000 RPMs
How do I know if I ground my espresso correctly?
Visually, your espresso grinds should look almost like confectionary sugar, but the real test, if you ground correctly, will be running it through your espresso machine.
If your espresso puck preparation is performed well, pulling an espresso shot that runs too fast or too slow could be contributed to less-than-ideal grind size. If your espresso pulls too quickly, you may need to grind finer, and the opposite would be true if your espresso brewed too fast.
The grind settings needed for espresso change as a coffee ages and what may have worked a day ago may not work today. Finding the ideal grind setting for your espresso is called “dialing in” your grinder.
How do you dial in for espresso?
Dialing in your espresso refers to the fine-tuning process that a barista carries out by adjusting the grind size of the coffee beans, preparing the puck, and tamping to achieve the optimal extraction time for the best-tasting shot. This process involves finding the right balance between coarser or finer grinds, puck preparation, and tamping to produce the perfect shot.
Steps would include:
- Set your grinder to the intended grind size.
- Purge a small amount of coffee as the coffee in the grinder previously may impact the new grind size setting.
- Your grinder is either set by time or volume. Grind and weigh your coffee and ensure you are hitting the total intended volume. If you weigh your grounds and the weight is too high, adjust the timer function on your grinder.
- Prepare your puck for brewing, using an even 30 pounds tamping force to ensure this part of the equation is not factored in when dialing in your espresso.
- Pull your espresso shot based on your intended recipe.
- If your brew takes too long or too short, it is time to repeat the above steps by changing your grind settings to either finer or coarser. Always purge coffee first before using the new grind settings.
- Repeat the above process until your coffee weight and espresso extraction is where you intended it to be. This is an exercise that should occur daily, especially if you switch coffees.
How do I find what my portafilter basket can hold?
Look at the manufacturer's website for your machine to see how much their single and double baskets can hold. Usually, baskets are graded by grams, and a basket that states 16g would brew properly using between 14 – 16 grams of coffee. When looking at basket sizes, always use a + or - 2g scale.
What is the difference between a single basket and a double basket?
A single shot basket typically holds between 7-12 grams of ground coffee and is used to prepare a single serving of espresso. The basket has a funnel-like shape and is typically paired with a single spouted portafilter. This combination allows for the optimal extraction of flavor from the ground coffee for a rich and full-bodied espresso shot.
A double basket typically ranges in size from 14 to 21 grams and is commonly used for brewing double shots of espresso. It is characterized by straight or slightly tapered walls. This basket is ideal for preparing espresso-based drinks with milk, such as lattes, as it provides a consistent and balanced extraction for a rich and full-bodied flavor.

Step 2: Prepare your Espresso Puck
Simply jumping right into tamping your espresso will most likely create channeling in your shot and leave you with an under-extracted brew.
Espresso puck preparation is a vital step that should be repeatable, consistent, and devoid of flaws in your puck. Espresso puck preparation is the steps taken to create consistency in your puck, from removing clumps and leveling your grounds before tamping. Water is quite lazy and will always move toward the path of least resistance. Your brew will extract unevenly if your puck contains clumps or is uneven before tamping.
Steps to take to ensure a better espresso extraction:
- Use portafilter paper at the bottom of your puck.
- Use a WDT to distribute grounds and remove clumps.
- Evenly tamp your coffee with 30 lbs of pressure.
- Add a puck screen at the top of your coffee grounds.
Espresso Puck Prep Questions
What does it mean when an espresso shot channels?
Channeling in espresso is a term used to describe the process of water seeping into cracks or flaws in an espresso puck, resulting in an uneven extraction. Channeling is often easily spotted when using a naked portafilter, or if your espresso “blondes” too early.
What is espresso puck preparation?
The process of preparing the coffee grounds for espresso brewing, from grinding the coffee beans to loading them into the portafilter, is referred to as espresso puck preparation. Some of the steps involved in this process include using a WDT (Weight Distribution Tool) to spread out the grounds, incorporating puck screens, and tamping the coffee before brewing.
Puck preparation is an iterative process as flaws spotted in your espresso brew and drink quality often fall back on improper or inconsistent puck preparation.
What is a WDT tool for espresso?
A WDT, or the Weiss Distribution Technique, is one of the longest-standing espresso distribution methods that helps improve espresso extraction through the even distribution and removal of any clumps in your coffee grounds.
What is an espresso puck screen used for?
The espresso puck screen is a metal mesh filter that is positioned over the ground espresso in the portafilter. The use of this metal mesh filter helps to ensure an even distribution of water over the espresso puck, reducing the risk of channeling during the brewing process and contributing to a better-tasting espresso.
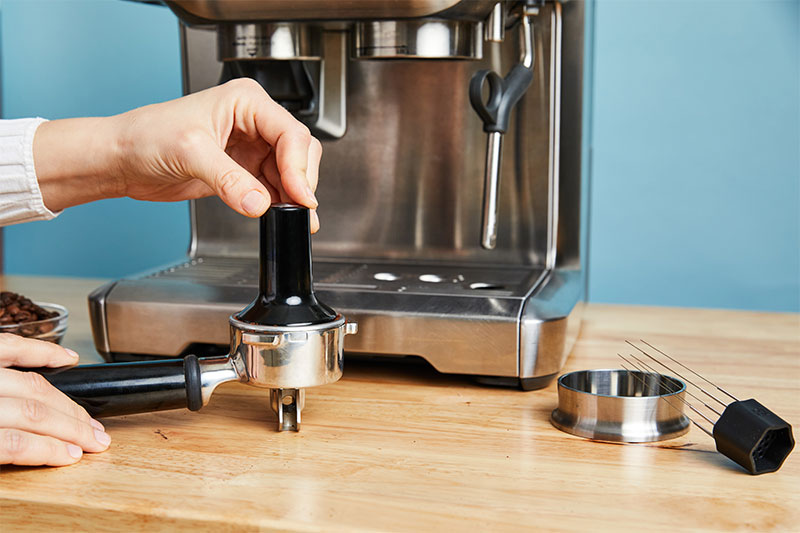
Step 3: Tamp
If you nailed your espresso puck preparation and have an evenly distributed puck of coffee, then tamping should be a breeze! Always apply even 30 lbs of pressure when you tamp the espresso grounds. After tamping, if you have an espresso puck screen, now would be the time to place it on top of the grounds.
Tamping Questions
How much pressure should I tamp with for espresso?
The optimal tamping pressure is roughly 30 pounds of pressure which is where you hit “maximum density” where the coffee grounds can be compacted no further.
The reason why 30 pounds of pressure is suggested is due to the “maximum density” concept. Once you reach maximum density, your job is complete. Further, tamping at 35 or 40 pounds of pressure just puts added stress on your joints and doesn’t further impact your brew.
Issues arise when you tamp too soft which creates inconsistencies in the puck, often causing channeling. You want to take tamping pressure out of the equation on why your espresso brews like “x” or tastes like “y”. Always tamp to 30 pounds of pressure or use a spring-loaded tamper which always hits the same amount of force each time.
What happens if you tamp espresso too hard?
It is entirely possible to tamp too soft which can lead to under-extracted sour-tasting shots but it is impossible to tamp coffee beyond the standard 30 pounds of pressure.
The reason why 30 pounds of pressure is suggested is due to the “maximum density” concept. Once you reach maximum density, your job is complete. Further, tamping at 35 or 40 pounds of pressure just puts added stress on your joints and doesn’t further impact your brew.
Issues arise when you tamp too soft which creates inconsistencies in the puck, often causing channeling. You want to take tamping pressure out of the equation on why your espresso brews like “x” or tastes like “y”. Always tamp to 30 pounds of pressure or use a spring-loaded tamper which always hits the same amount of force each time.
What can I use instead of an espresso tamper?
There are other tools besides the traditional tamper that compresses coffee grounds to the needed 30 pounds of pressure. That said, with espresso brewing, tamping, or compression is needed to tightly compact the coffee grounds in preparation for high-pressurized brewing.
Tamping tools include:
- Traditional tamper
- Distribution tool with built-in tamper
- Palm tamper
- Automatic tamper like the Puqpress
- Spring-loaded traditional tamper
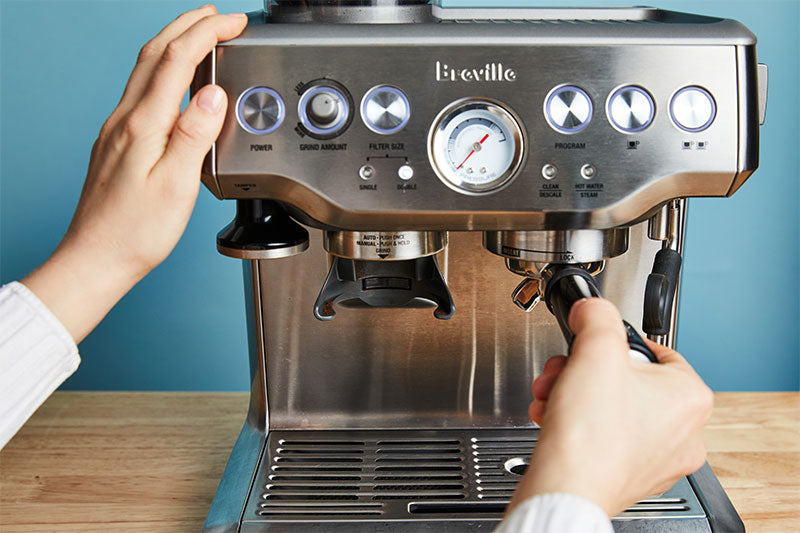
Step 4: Lock in your Portafilter
Next, place and lock your portafilter into the espresso machine. Make sure the portafilter is in the locked position but don’t crank too hard, as you will quickly wear out the rubber gasket.
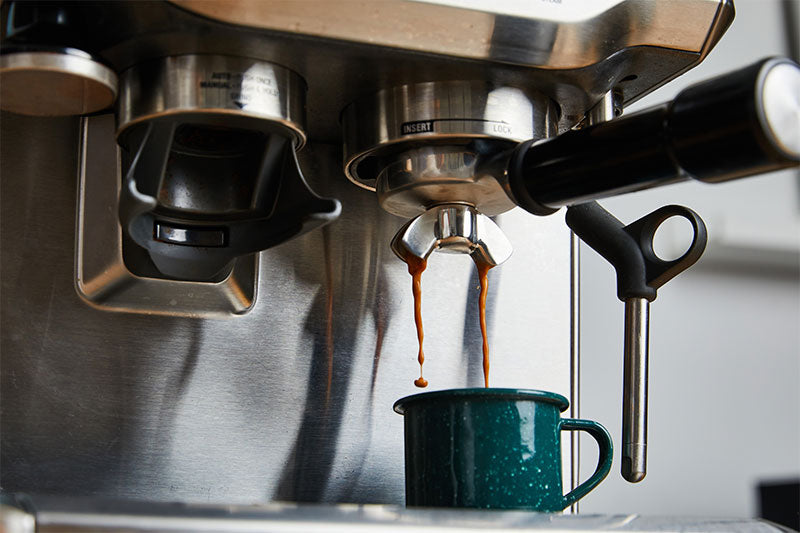
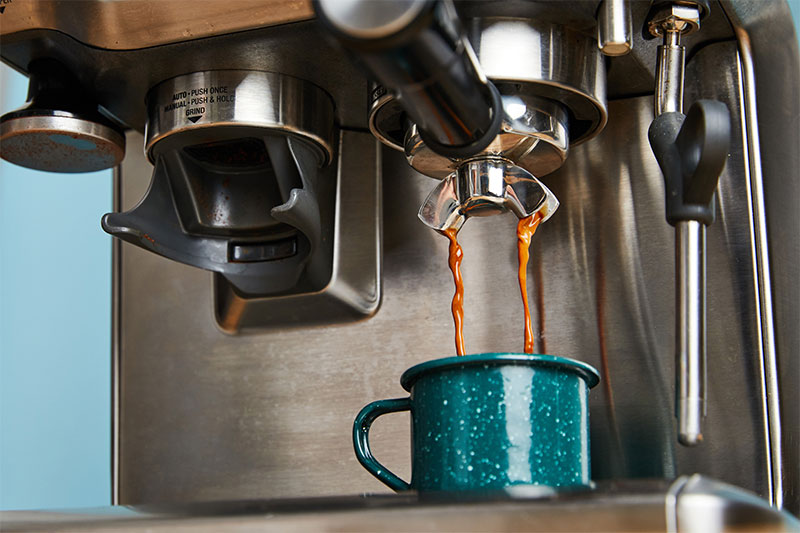
Step 5: Choose Shot Volume and Brew
Total Shot Weight: 36 - 40 grams
Total Shot Time: 30 - 35 seconds
Most espresso machines will come with several buttons, usually one for a single shot and another for a double shot. Our recipe calls for an 18-gram double shot of espresso yielding 36 grams of liquid within 30 – 35 seconds.
The moment of truth, once you hit the brew button, you can quickly tell if your grind size and espresso puck preparation were ideal. Most espresso machines will run through a preinfusion phase lasting 8 – 10 seconds before your espresso begins to brew. Once your espresso starts brewing, you are looking for a consistent flow of around 1 – 1.5 grams a second until your stop time of approximately 35 seconds.
If your espresso reaches 36 – 40 grams in under 30 seconds, you may have slightly under-extracted your espresso. Taste is always paramount to timing, so give the espresso a swirl and taste before you make any conclusions. If you want to slow down your espresso shot, slightly adjust your grinder toward the finer setting.
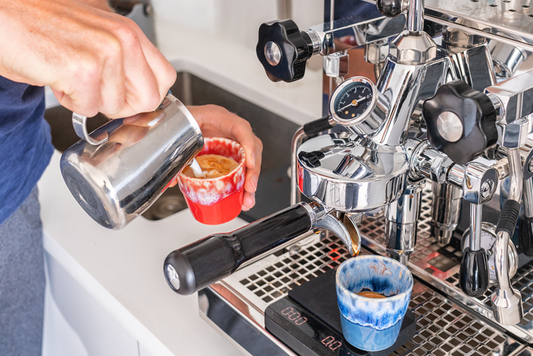
Step 6: Serve and Enjoy!
Give your espresso a stir and drink as is, or steam some milk and create a delicious milk-based espresso drink.
If you want to take your espresso drink one step further and add milk to create one of the classic milk-based drinks, check out our espresso drink calculator, where you can calculate the perfect proportion of espresso to milk to make the perfect espresso beverage.
Try Our Espresso Roast Coffee
-
Best Seller
Espresso Roast Coffee
A balanced and naturally sweet espresso - great for straight espresso or smaller milk-based drinks
A balanced and naturally sweet espresso - great...
Regular price From $10.29Regular priceUnit price per -
Best Seller
Dark Espresso Roast Coffee
A bold and far from bitter espresso, chocolatey, heavy body, and perfect for milk-based drinks
A bold and far from bitter espresso, chocolatey...
Regular price From $10.29Regular priceUnit price per -
Dark Roast Coffee
A traditional-tasting dark roast but roasted slightly lighter to better highlight terroir
A traditional-tasting dark roast but roasted sl...
Regular price From $10.29Regular priceUnit price per -
Best Seller
Costa Rican | Las Lajas | Natural
An exceptionally well-balanced coffee with winey fruit and chocolate notes
An exceptionally well-balanced coffee with wine...
Regular price From $13.40Regular priceUnit price per

Espresso Brewing Tips
-
Mastering the Art of Espresso: The Role of Timi...
Mastering the Art of Espresso: The Role of Timing and Measurement Introduction Mastering the art of brewing a perfect shot of espresso takes practice and patience. There are many factors...
Mastering the Art of Espresso: The Role of Timi...
Mastering the Art of Espresso: The Role of Timing and Measurement Introduction Mastering the art of brewing a perfect shot of espresso takes practice and patience. There are many factors...
